Project Aria Machine Perception Services CLI Guide
Overview
The Project Aria MPS CLI Guide provides detailed information about how to use this tool. The guide contain:
- About the MPS CLI
- How the MPS CLI works
- Go to MPS Data Lifecycle for more details about how sequences are processed on the server
- MPS CLI Settings
- MPS CLI Command Line Reference
Further resources:
- Getting Started With the MPS CLI for a quick tutorial showing basic commands using sample data.
- MPS Troubleshooting and Error Codes
About
The Project Aria MPS Command Line Interface (MPS CLI), part of Project Aria Tools, is the preferred way to request Machine Perception Services (MPS).
The MPS CLI has two modes:
- Single
- Process each recording individually
- The input can be a file and/or directory, so you can batch process multiple recordings with a single command
- Output is always saved next to the input file
- The most common way to request MPS
- Multi
- Process multiple recordings to generate multi-sequence SLAM data
- User must provide a directory for the outputs
Go to MPS CLI Overview for a full breakdown of all the available features.
How the MPS CLI works
The MPS CLI enables you to upload VRS files from your computer to the Meta servers for processing. The outputs are then saved to your local directory. The MPS CLI will try to process multiple recordings concurrently. The concurrency for various stages can be controlled via Settings.
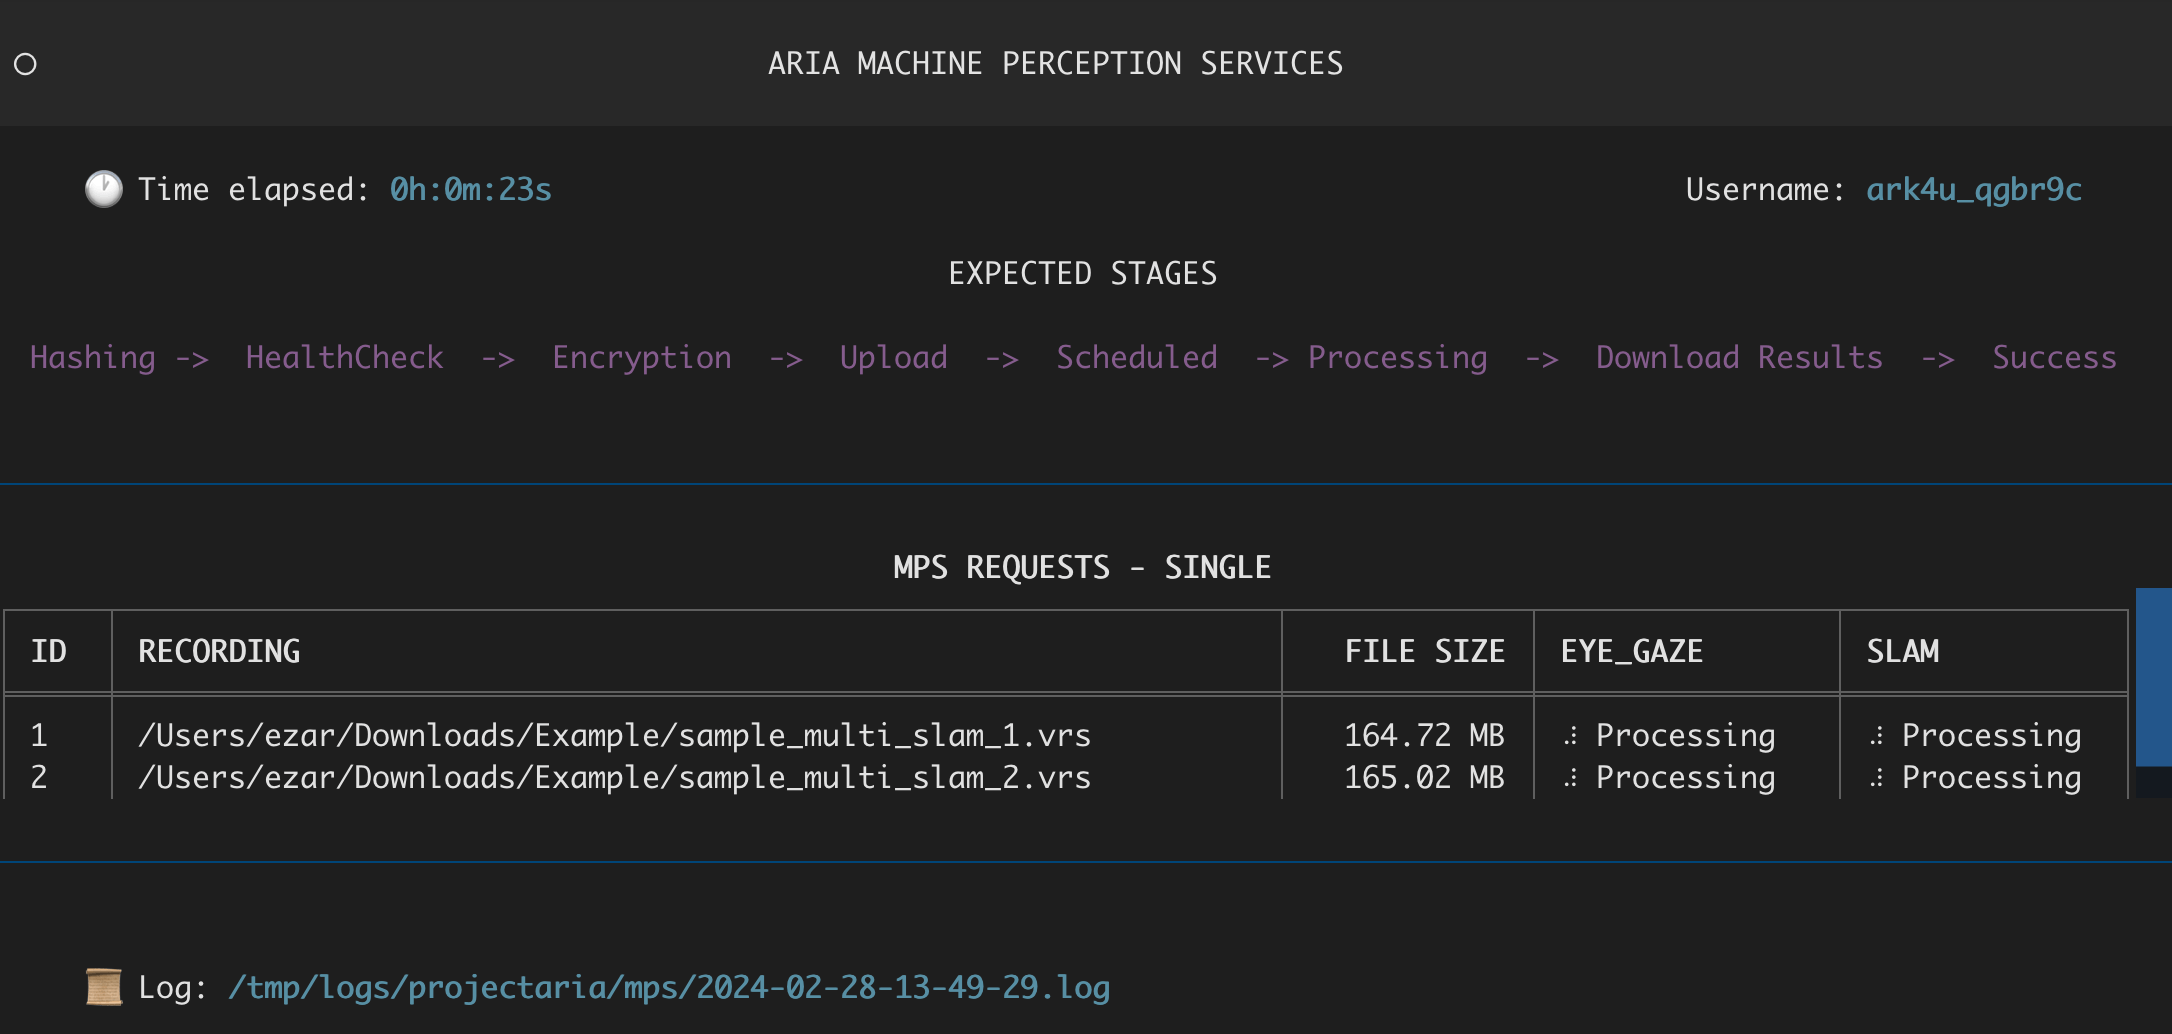
- Once you submit your request, the MPS CLI for the selected mode will open and show the status of your requests.
- See the Getting Started or the Command Line Reference below for how to submit a request.
- Once authenticated, the request tool checks with the server to see if this recording was previously processed. We use unique IDs (Hashing stage) to check if this is a new or a previously known recording.
- If it is a known recording, we skip processing and directly download the results (Download Results stage) or show the error code.
- If this is a new recording, we run health checks on the recording (HealthCheck stage), to minimize the chances that it will fail during processing. While this check catches obvious errors, like gaps in data and ensures presence of the right sensor streams, but server side processing may still fail.
- If the health check passes, the recording is encrypted on your machine (Encrypting stage).
- After encryption, the recordings are uploaded to the MPS servers (Uploading stage) for processing.
- Uploads are resumable.
- Interrupted uploads can be resumed within 24 hours.
- Data is processed on MPS servers (Processing stage).
- The MPS CLI periodically checks the MPS request's status on the server.
- It is safe to close the MPS Request tool once the data is processing. When the MPS CLI is reopened, it will check the status of your data and progress to Downloading if it is ready.
The server re-attempts processing multiple times before it stops and provides an error message
- Check Error Codes to see what the error was.
- We encourage you to send a bug report with log files to Aria User Support if it is not an error code 1xx. By default, logs are stored in /tmp/logs/projectaria/mps/.
- Once the processing is complete, and the tool is open, outputs are automatically downloaded (Downloading stage).
- Recordings in the MPS CLI UI will show the Success status once the outputs been successfully downloaded.
Logs
Each run will write the console logs to a log file on the local drive. Since the MPS CLI can run concurrently on multiple recordings, these logs are useful for debugging purposes. The logs are named by the current time when the request was initiated via CLI.
By default, logs are stored in /tmp/logs/projectaria/mps/. The location can be modified in settings.
CLI Settings
Project Aria MPS CLI settings can be customized via the mps.ini file. This file is located in the $HOME/.projectaria/mps.ini
| Setting | Description | Default Value |
| General settings | ||
log_dir | Where log files are saved for each run. The filename is the timestamp from when the request tool started running. | /tmp/logs/projectaria/mps/ |
status_check_interval | How long the MPS CLI waits to check the status of data during the Processing stage. | 30 secs |
| HASH | ||
concurrent_hashes | Maximum number of files that can be concurrently hashed | 4 |
chunk_size | Chunk size to use for hashing | 10MB |
| Encryption | ||
chunk_size | Chunk size to use for encryption | 50MB |
concurrent_encryptions | Maximum number of files that can be concurrently encrypted | 4 |
delete_encrypted_files | Whether to delete the encrypted files after upload is done. If you set this to false local disk usage will double, due to an encrypted copy of each file. | True. |
| Health Check | ||
concurrent_health_checks | Maximum number of VRS file healthchecks that can be run concurrently | 2 |
| Uploads | ||
backoff | The exponential back off factor for retries during failed uploads. The wait time between successive retries will increase with this factor. | 1.5 |
interval | Base delay between retries. | 20 secs |
retries | Maximum number of retries before giving up. | 10 |
concurrent_uploads | Maximum number of concurrent uploads. | 4 |
max_chunk_size | Maximum chunk size that can be used during uploads. | 100 MB |
min_chunk_size | The minimum upload chunk size. | 5 MB |
smoothing_window_size | Size of the smoothing window to adjust the chunk size. This value defines the number of uploaded chunks that will be used to determine the next chunk size. | 10 |
target_chunk_upload_secs | Target time to upload a single chunk. If the chunks in a smoothing window take longer, we reduce the chunk size. If it takes less time, we increase the chunk size. | 3 secs |
| GraphQL (Query the MPS backend for MPS Status) | ||
backoff | This the exponential back off factor for retries for failed queries. The wait time between successive retries will increase with this factor | 1.5 |
interval | Base delay between retries | 4 secs |
retries | Maximum number of retries before giving up | 3 |
| Download | ||
backoff | This the exponential back off factor for retries during failed downloads. The wait time between successive retries will increase with this factor. | 1.5 |
interval | Base delay between retries | 20 secs |
retries | Maximum number of retries before giving up | 10 |
chunk_size | The chunk size to use for downloads | 10MB |
concurrent_downloads | Number of concurrent downloads | 10 |
delete_zip | The server will send the results in a zip file. This flag controls whether to delete the zip file after extraction or not | True |
Command line reference
The MPS CLI has two distinct modes: single (process each recording individually) and multi (SLAM outputs for multiple recordings in a shared co-ordinate frame).
aria_mps single <options>
or
aria_mps multi <options>
Help
To see the available options and subcommands, use:
--help
or
-h
Authentication
Log in
The first time you use the MPS CLI, you’ll be prompted to enter your username and password. Use the Project Aria credentials you use to sign into the Mobile Companion app. You can also supply the username and password via CLI input. This option is more suited for running MPS as part of a batch script or other automated workflows.
The authentication token gets saved in the $HOME/.projectaria directory.
To log in using the CLI
-u USERNAME -p PASSWORD
or
--username USERNAME --password PASSWORD
Token storage
The login token is saved onto your machine by default.
If you request MPS using --no-ui , you'll have the option to pass --no-save-token. This means the token won't be saved. Once processing is complete the MPS CLI will also logout and invalidate any existing tokens.
Log out
Use the following command to log out the authentication token and delete it from the system. Next time you run the CLI, it will ask for username and password again.
aria_mps logout
Request commands for any mode
These options are shared between both modes.
Define input path
Provides the path for a directory or file that will be uploaded for processing. Where a directory is provided, all subdirectories will be scanned for VRS files. At least one input file must be provided. There is no limit of how many files or folders can be included in a single request.
-i INPUT
or
--input INPUT
Force the provided files to be reprocessed
Force the server to reprocess all of the provided files, regardless of their current state on the server.
--force
Automatically retry processing if it fails
By default the MPS server will retry processing data multiple times before generating a failure code. By adding this flag requests automatically retries again if the processing fails. This command is generally only worth using if you’ve done some debugging to warrant it.
--retry-failed
If you retry 30 days after the recording was uploaded, you'll also need to re-upload the data.
Don’t show the UI
Instead of the MPS CLI UI, you’ll see the raw outputs and processes in the command line.
--no-ui
Single Recording mode
Select the MPS you wish to generate
By default, Eye Gaze and SLAM MPS are generated. Use the features option to select a single service, which can speed up processing.
--features {EYE_GAZE,SLAM}
Multi-Recording mode
Define the output directory
Define the output directory where the results will be stored. Setting the output path is required. The output directory must be empty before processing starts.
-o OUTPUT_DIR
Or
--output OUTPUT_DIR