Recordings on Computer
The Recordings on Computer page lets you manage VRS recordings that have been imported to your local machine, request Machine Perception Services (MPS), and visualize recordings in the Rerun viewer.
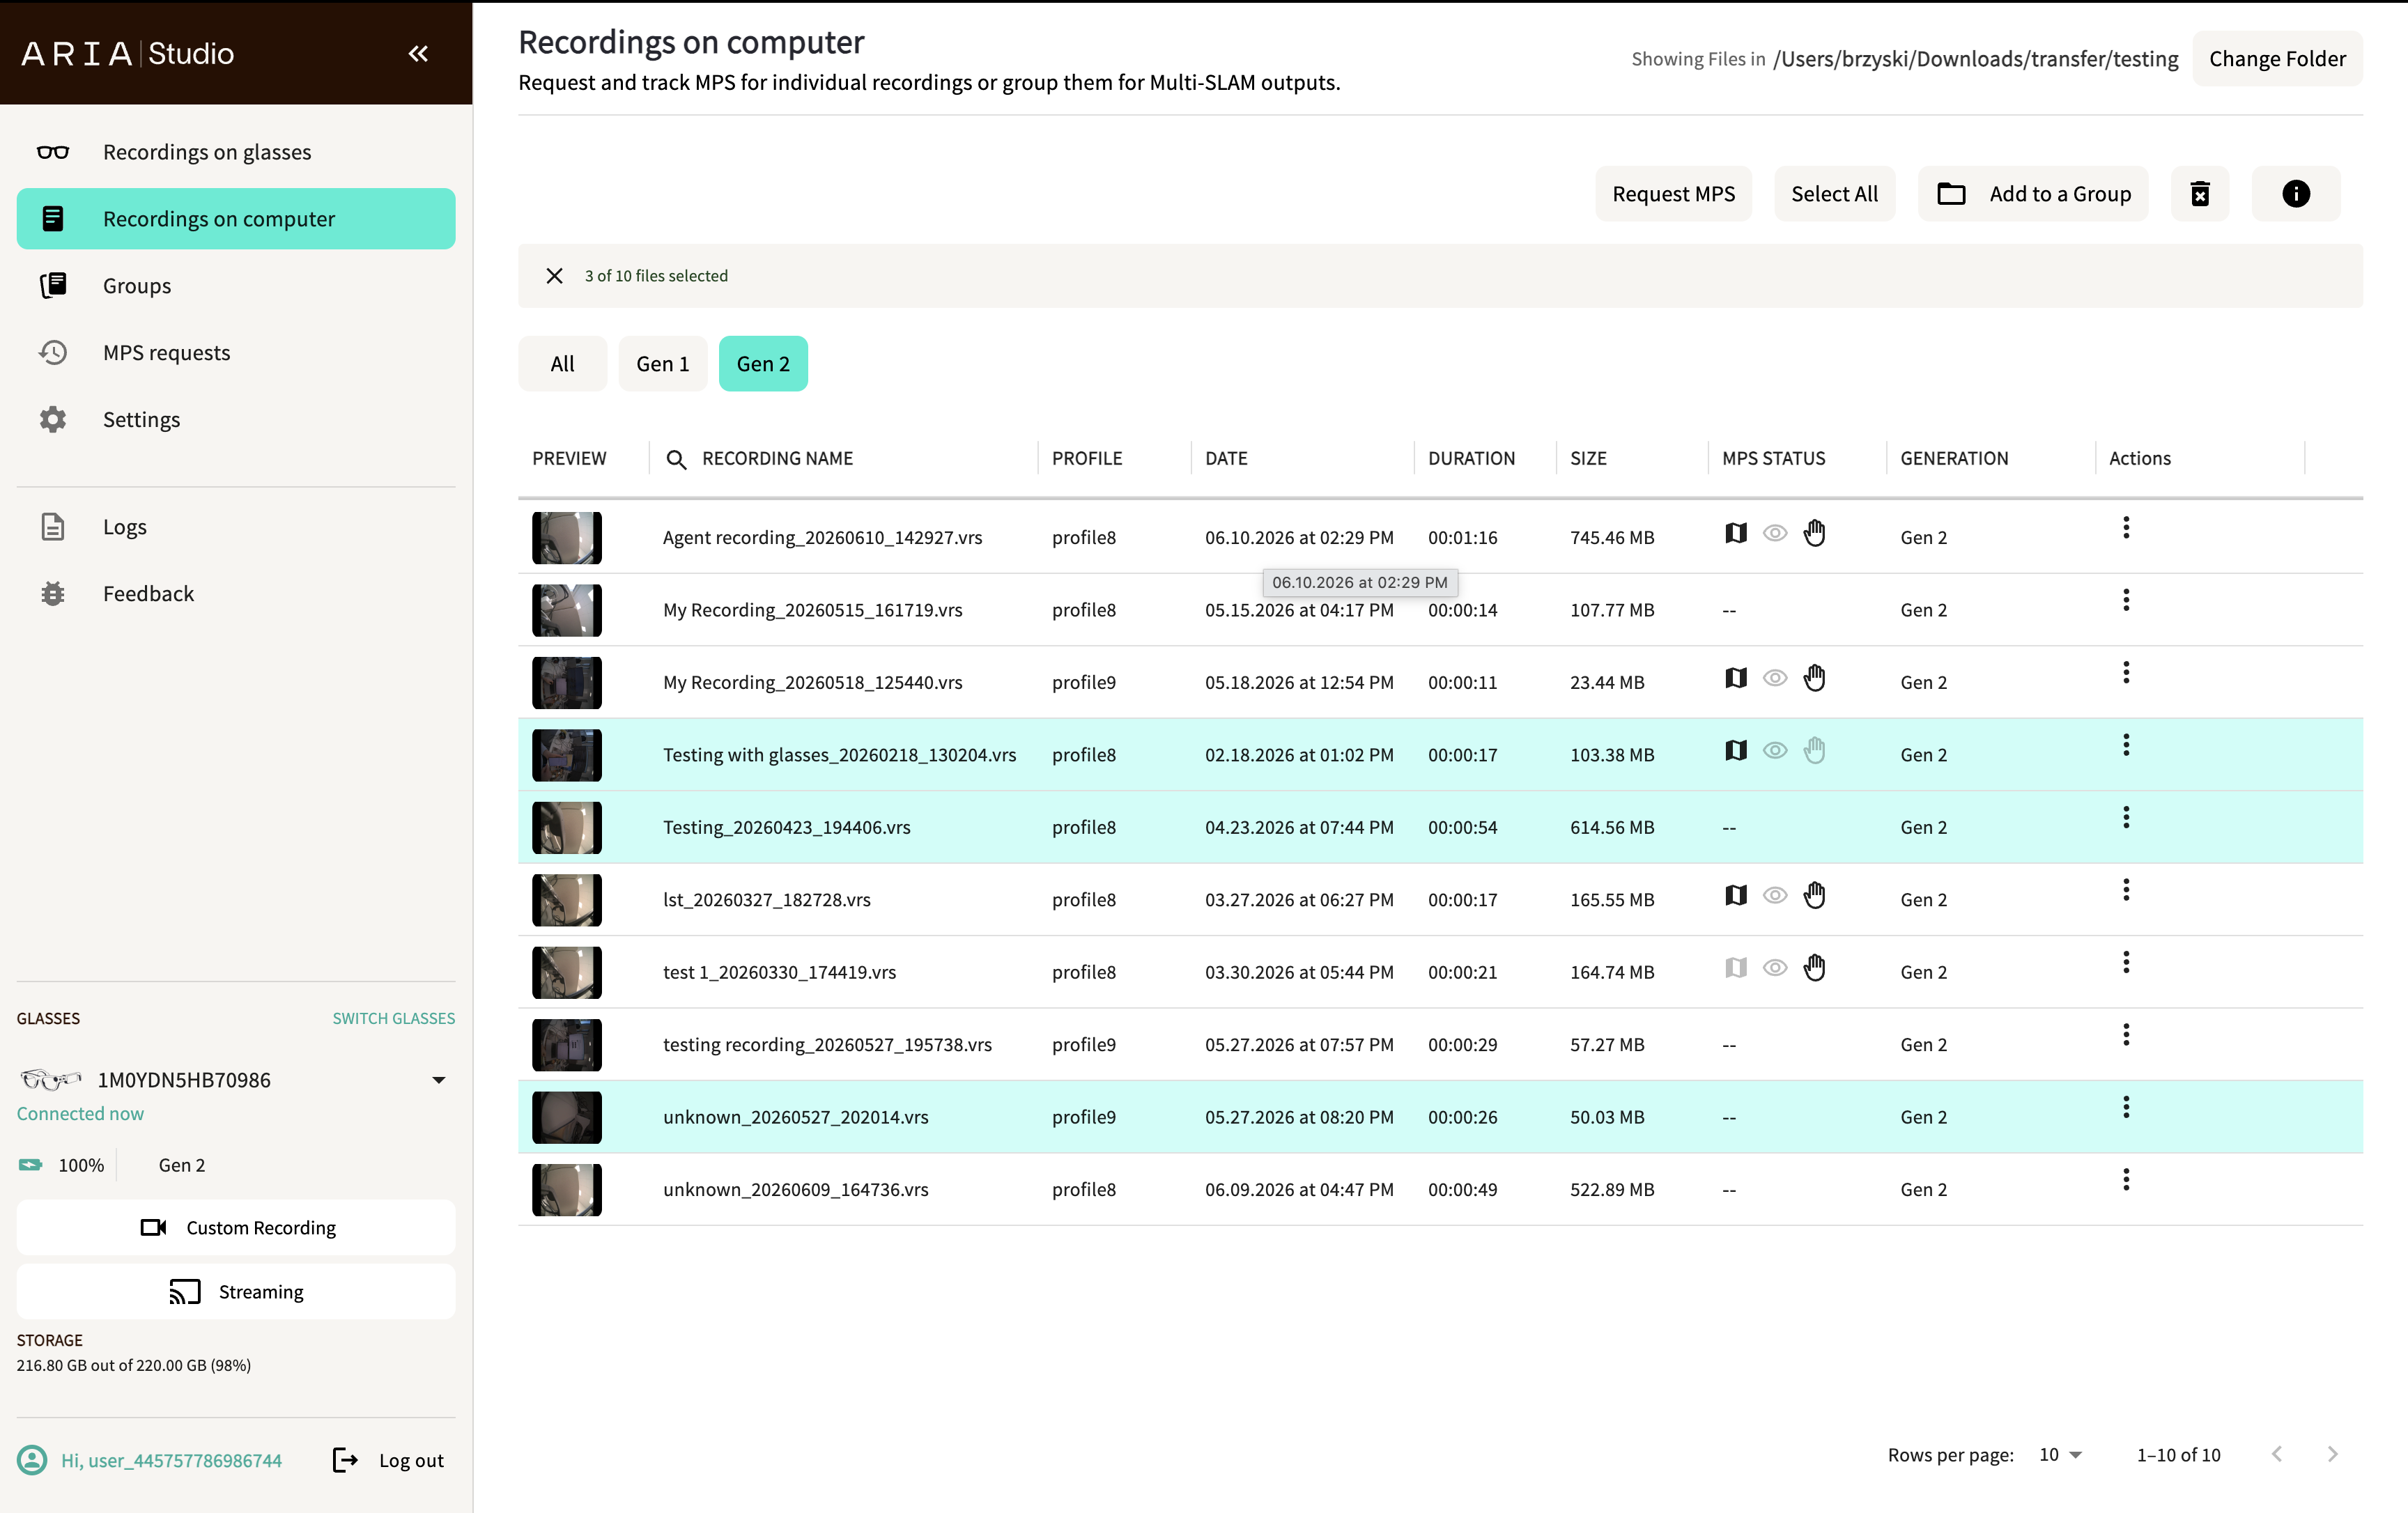
Browse local recordings
All VRS files in your configured directory appear as a list with the following columns:
- Preview thumbnail
- Recording name
- Recording profile
- Date
- Duration
- File size
- MPS status (icons indicating which MPS services have been processed)
- Device generation (Gen 1 / Gen 2)
- Actions menu
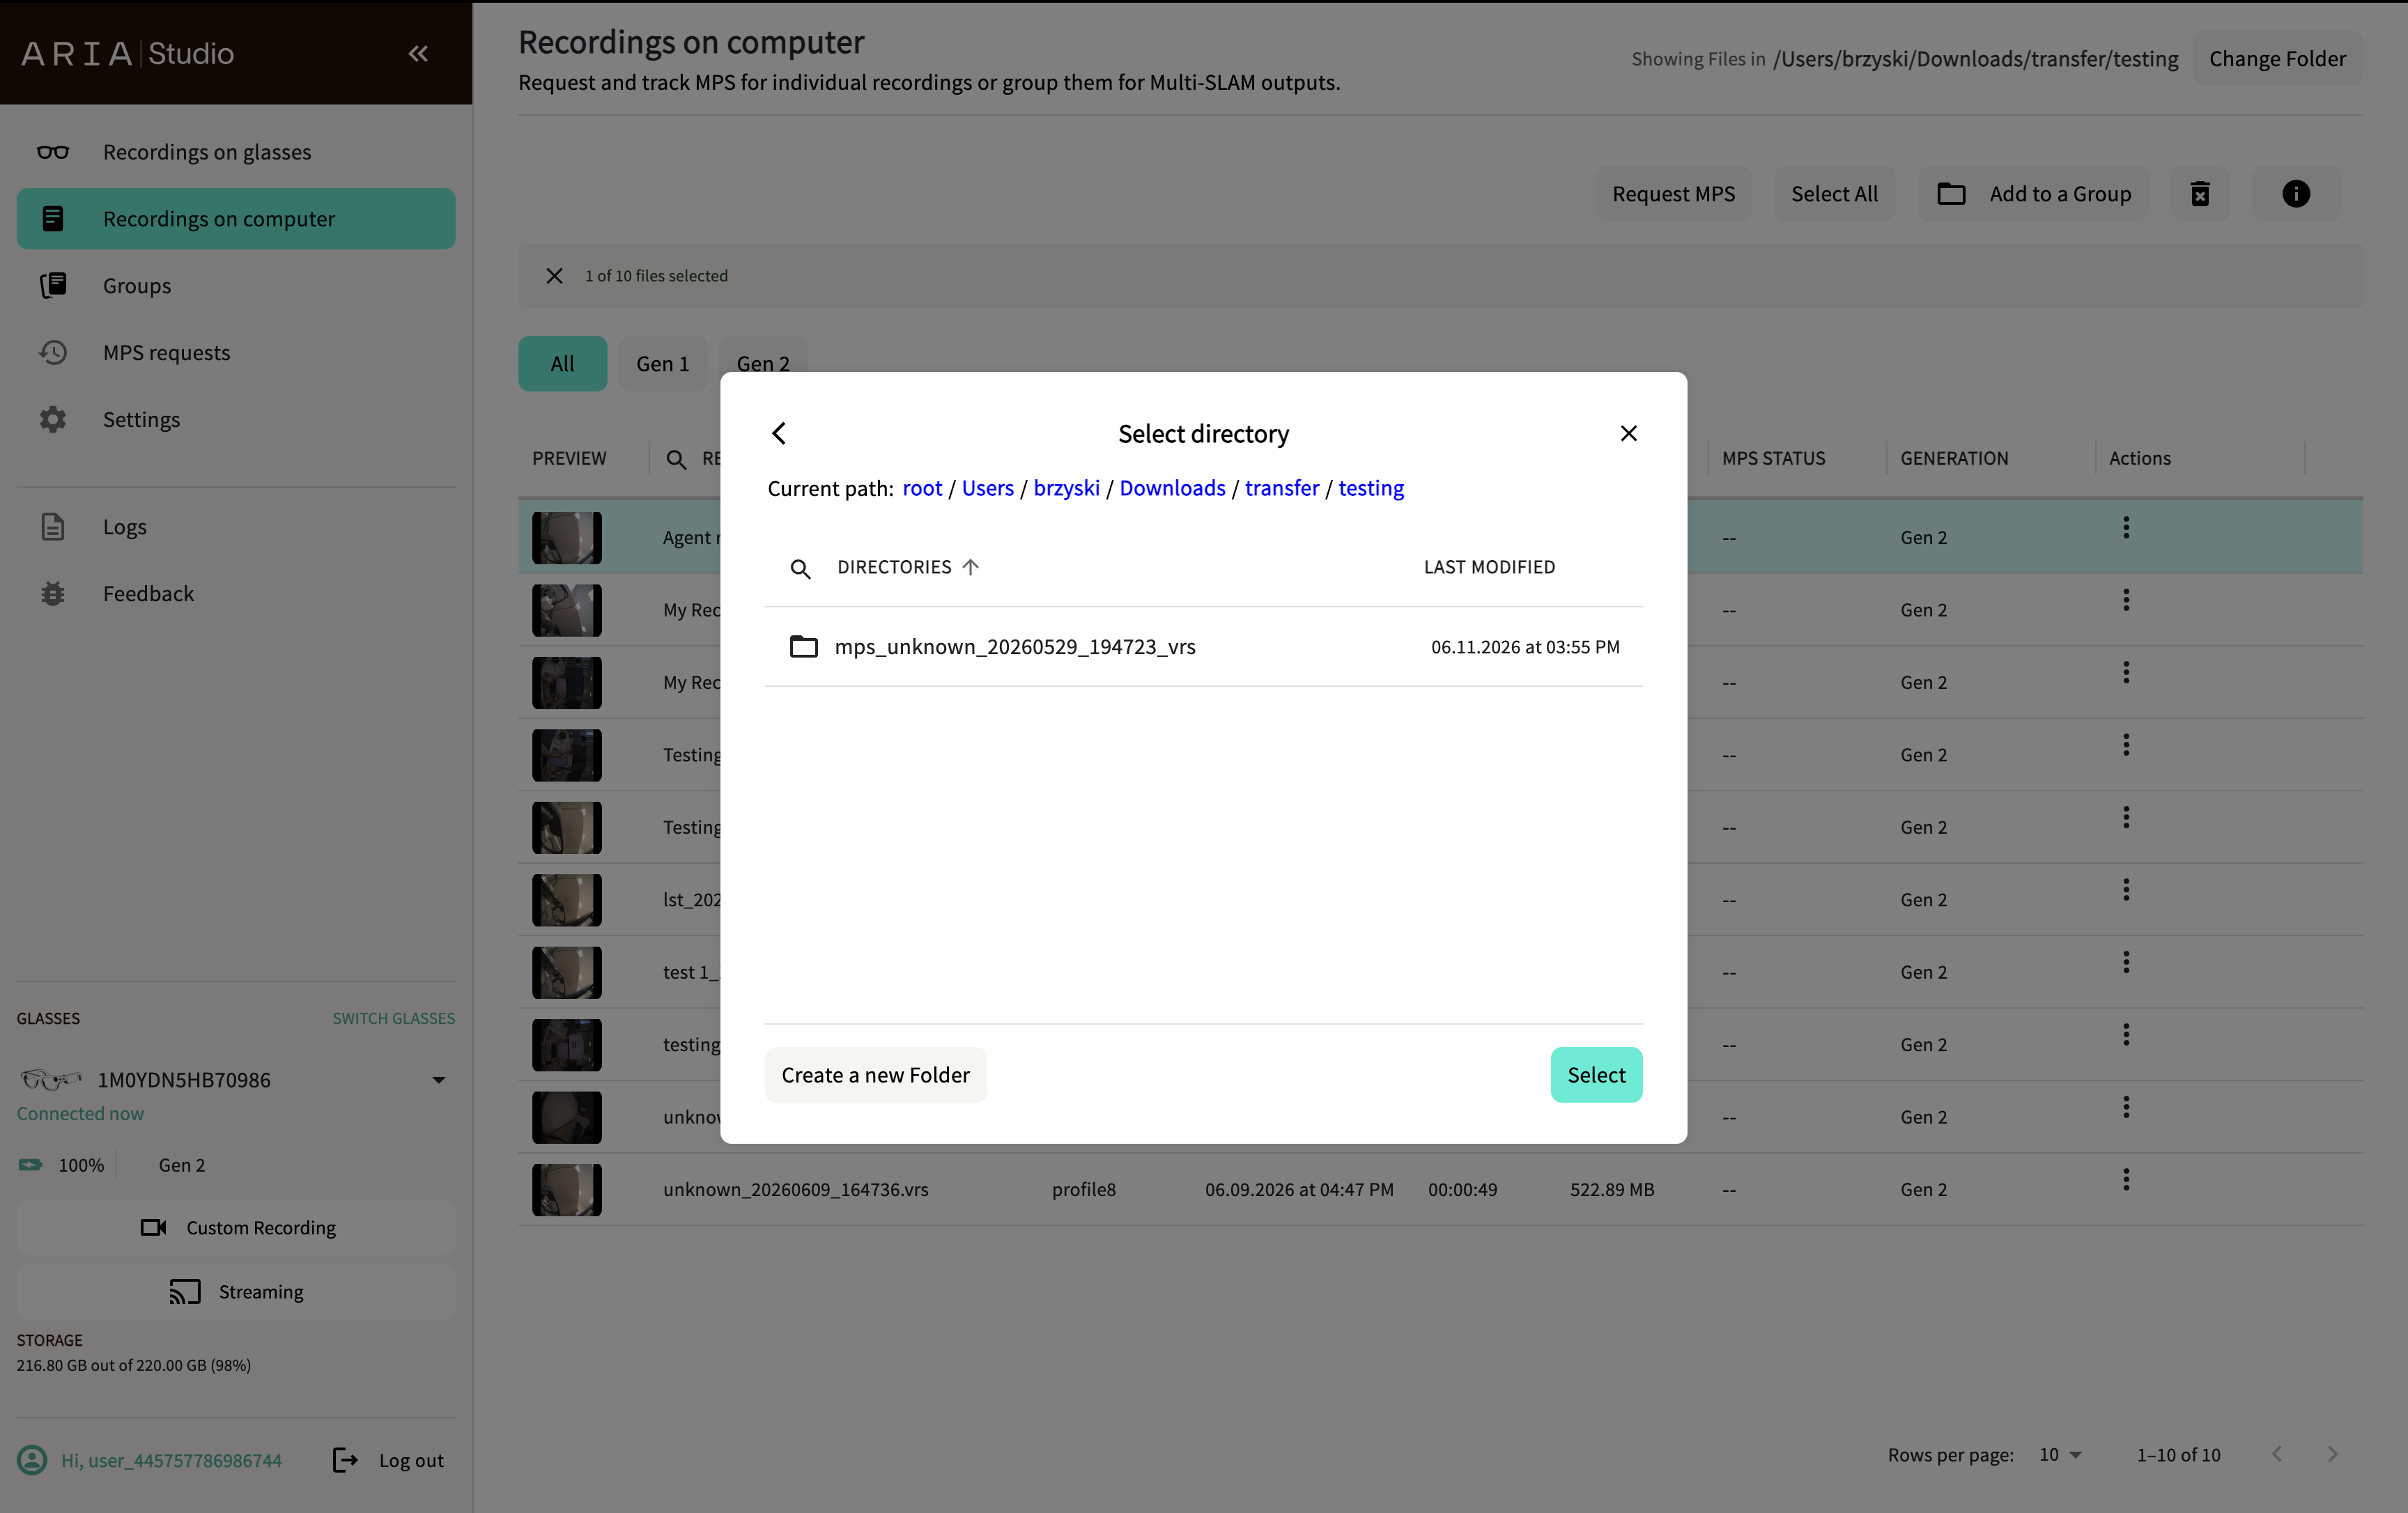
The current folder path is shown in the top-right corner. Select Change Folder to browse to a different directory using the Select directory dialog. You can also create a new folder from this dialog.
Use the Generation filter tabs (All, Gen 1, Gen 2) in the header to filter recordings by device generation.
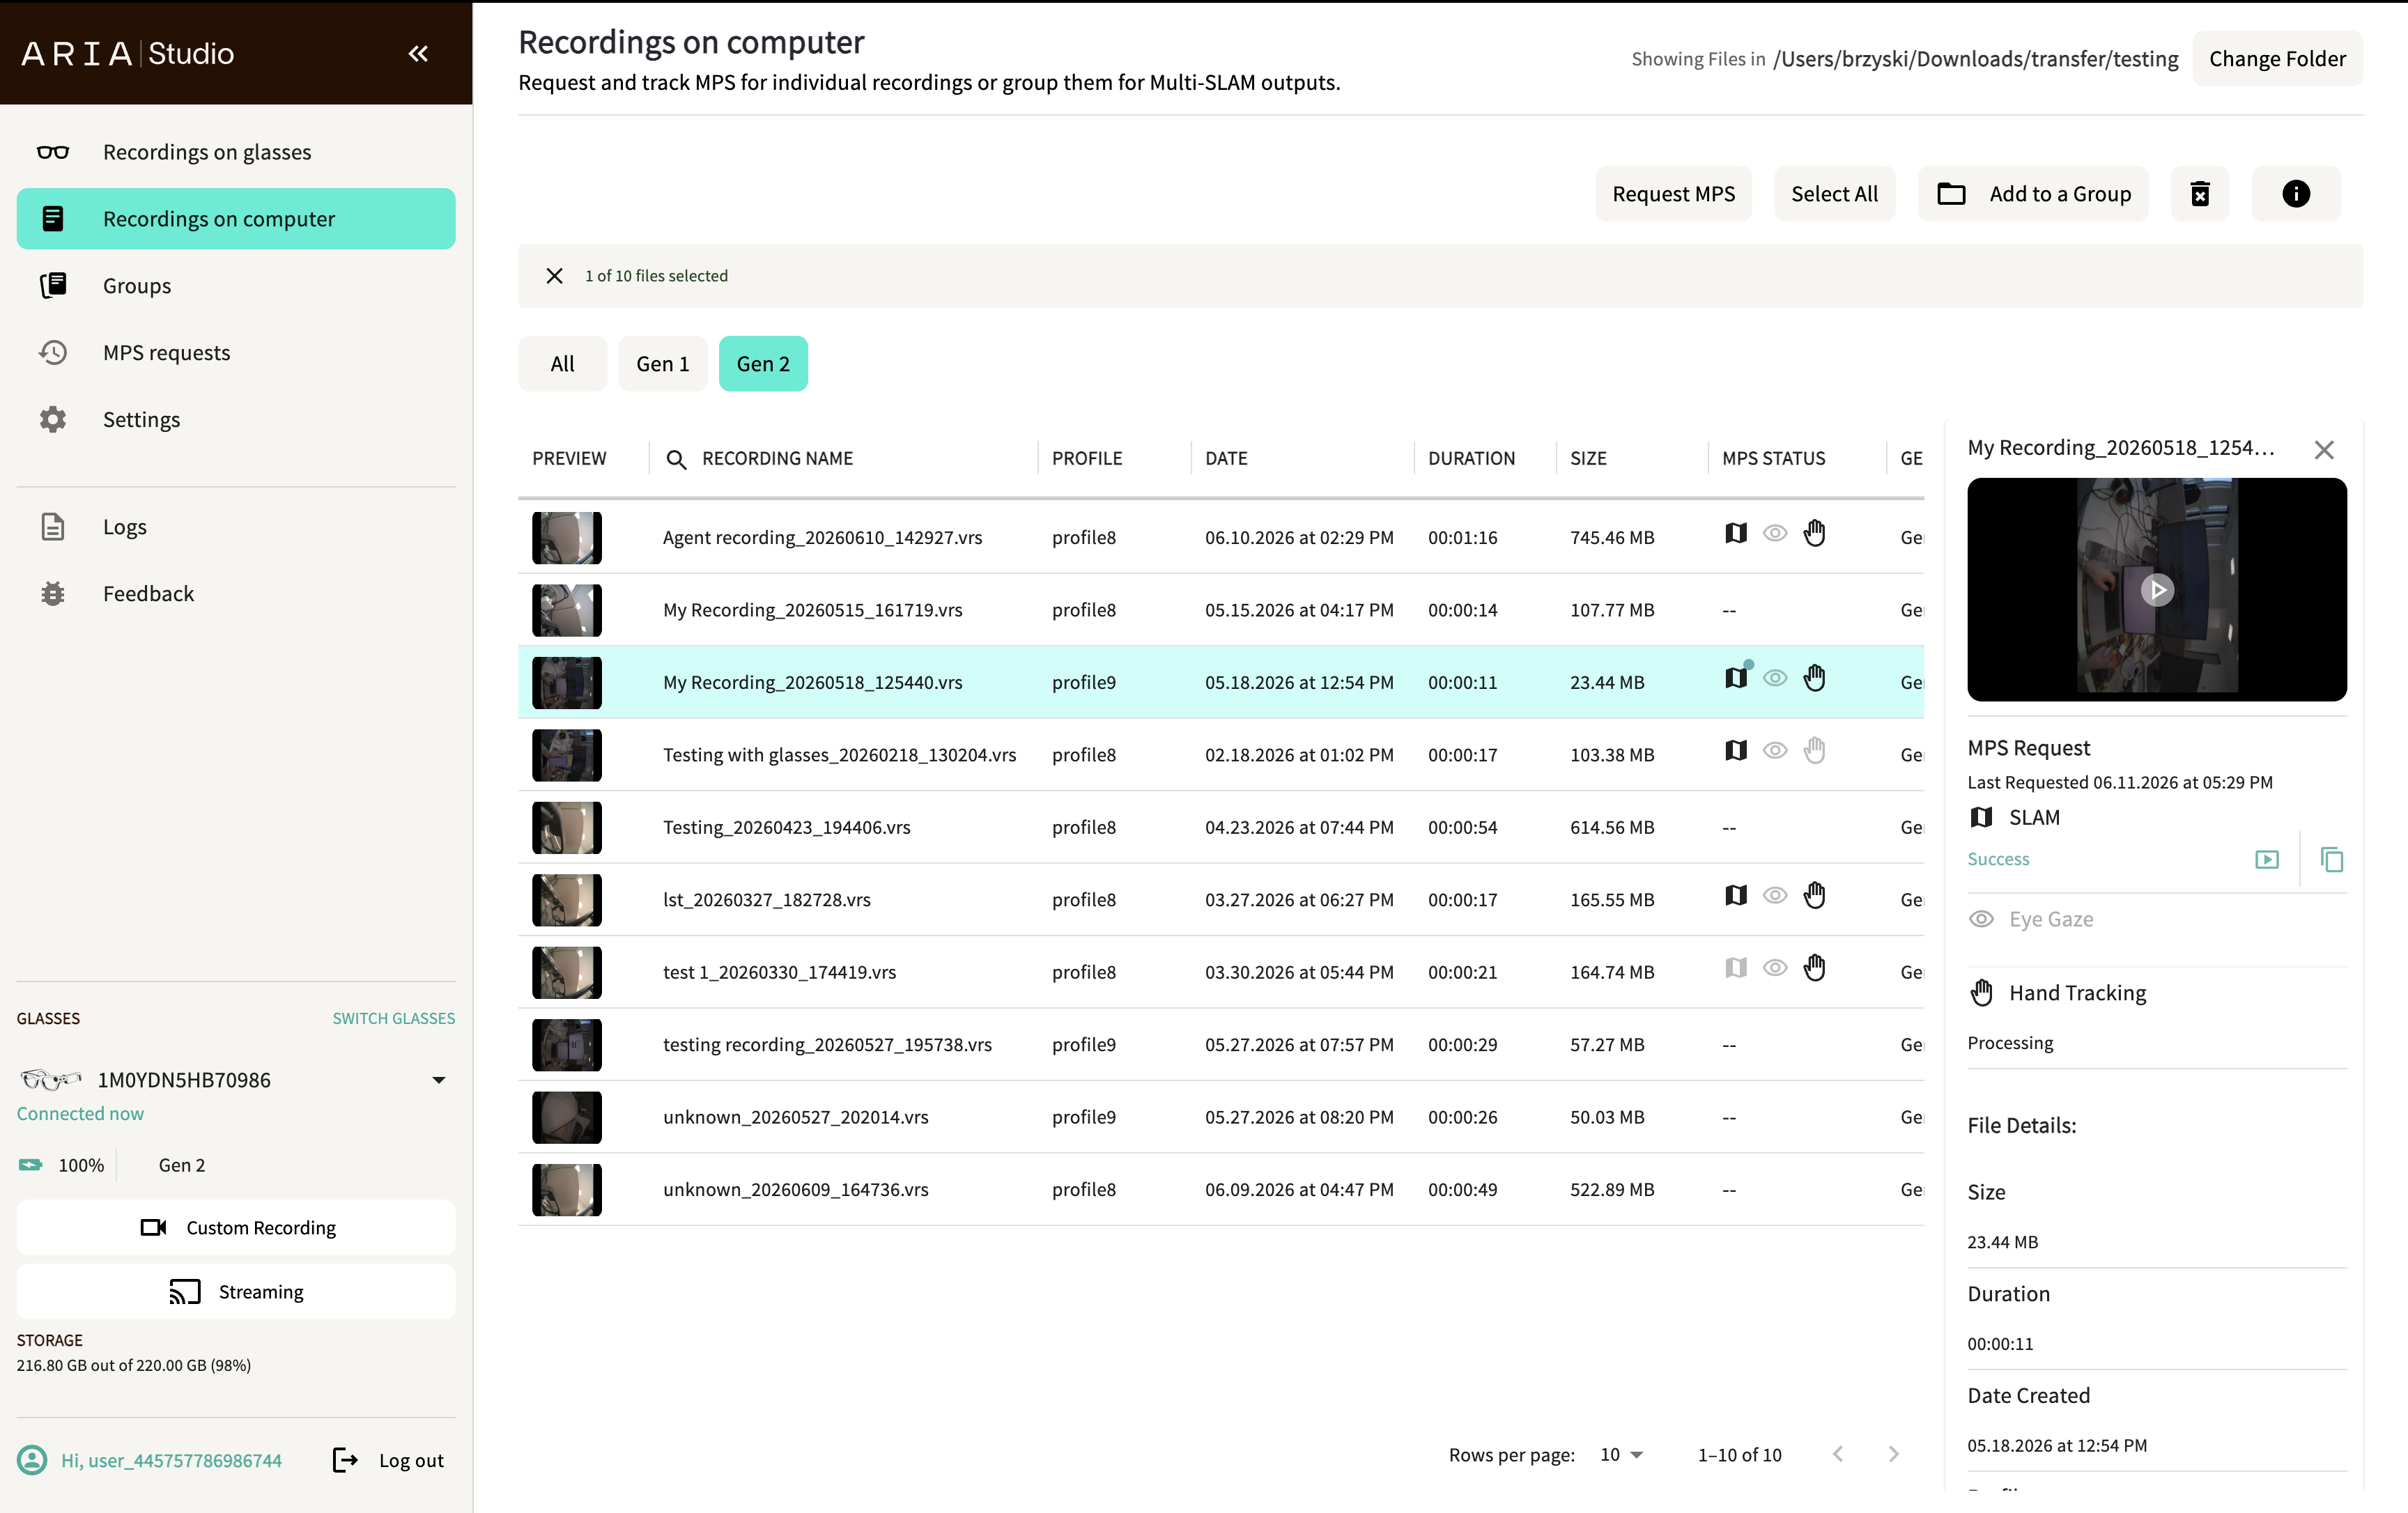
Recording details
Select the info button in the header to open a details panel on the right side. Click a recording to view its details, including:
- Video preview with playback
- MPS request status for each service (SLAM, Eye Gaze, Hand Tracking) with links to view results
- File details: size, duration, and date created
Visualize a recording
Use the actions menu on a recording to open it in the Rerun viewer. The viewer displays all sensor streams from the VRS file, including RGB camera, SLAM cameras, IMU data, microphones, eye tracking cameras, GPS, and barometer/magnetometer data.
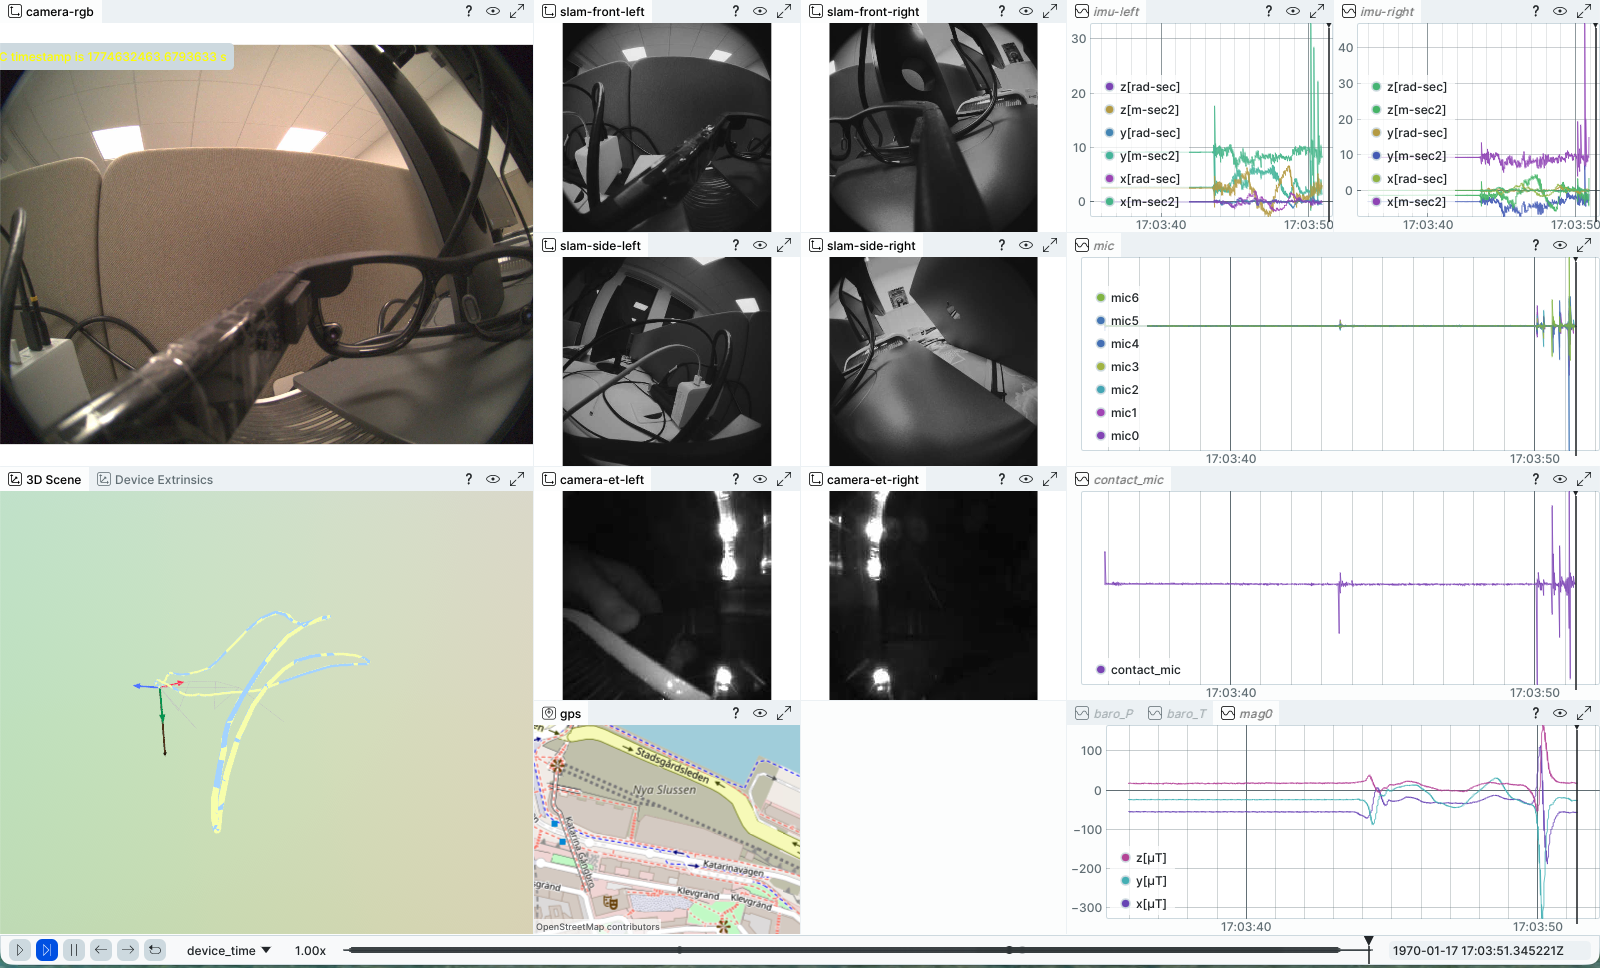
If MPS results are available, they are overlaid in the Rerun viewer showing the device trajectory, 3D point cloud, and camera feed.
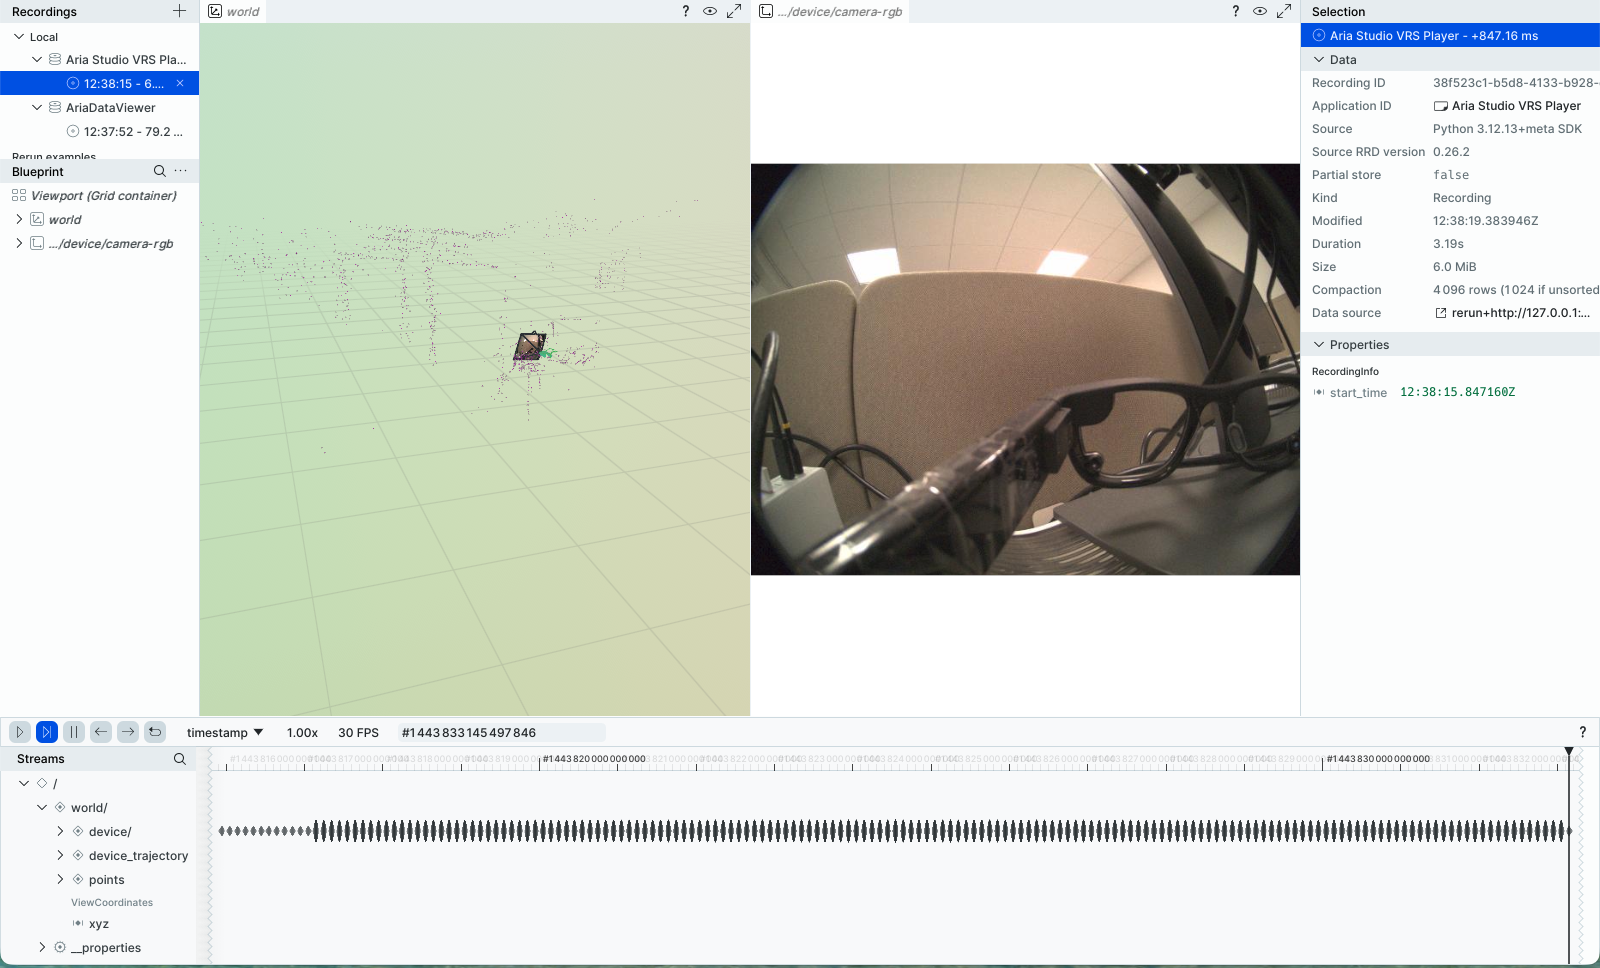
Only one visualization can be active at a time. Starting a new visualization automatically closes the previous one.
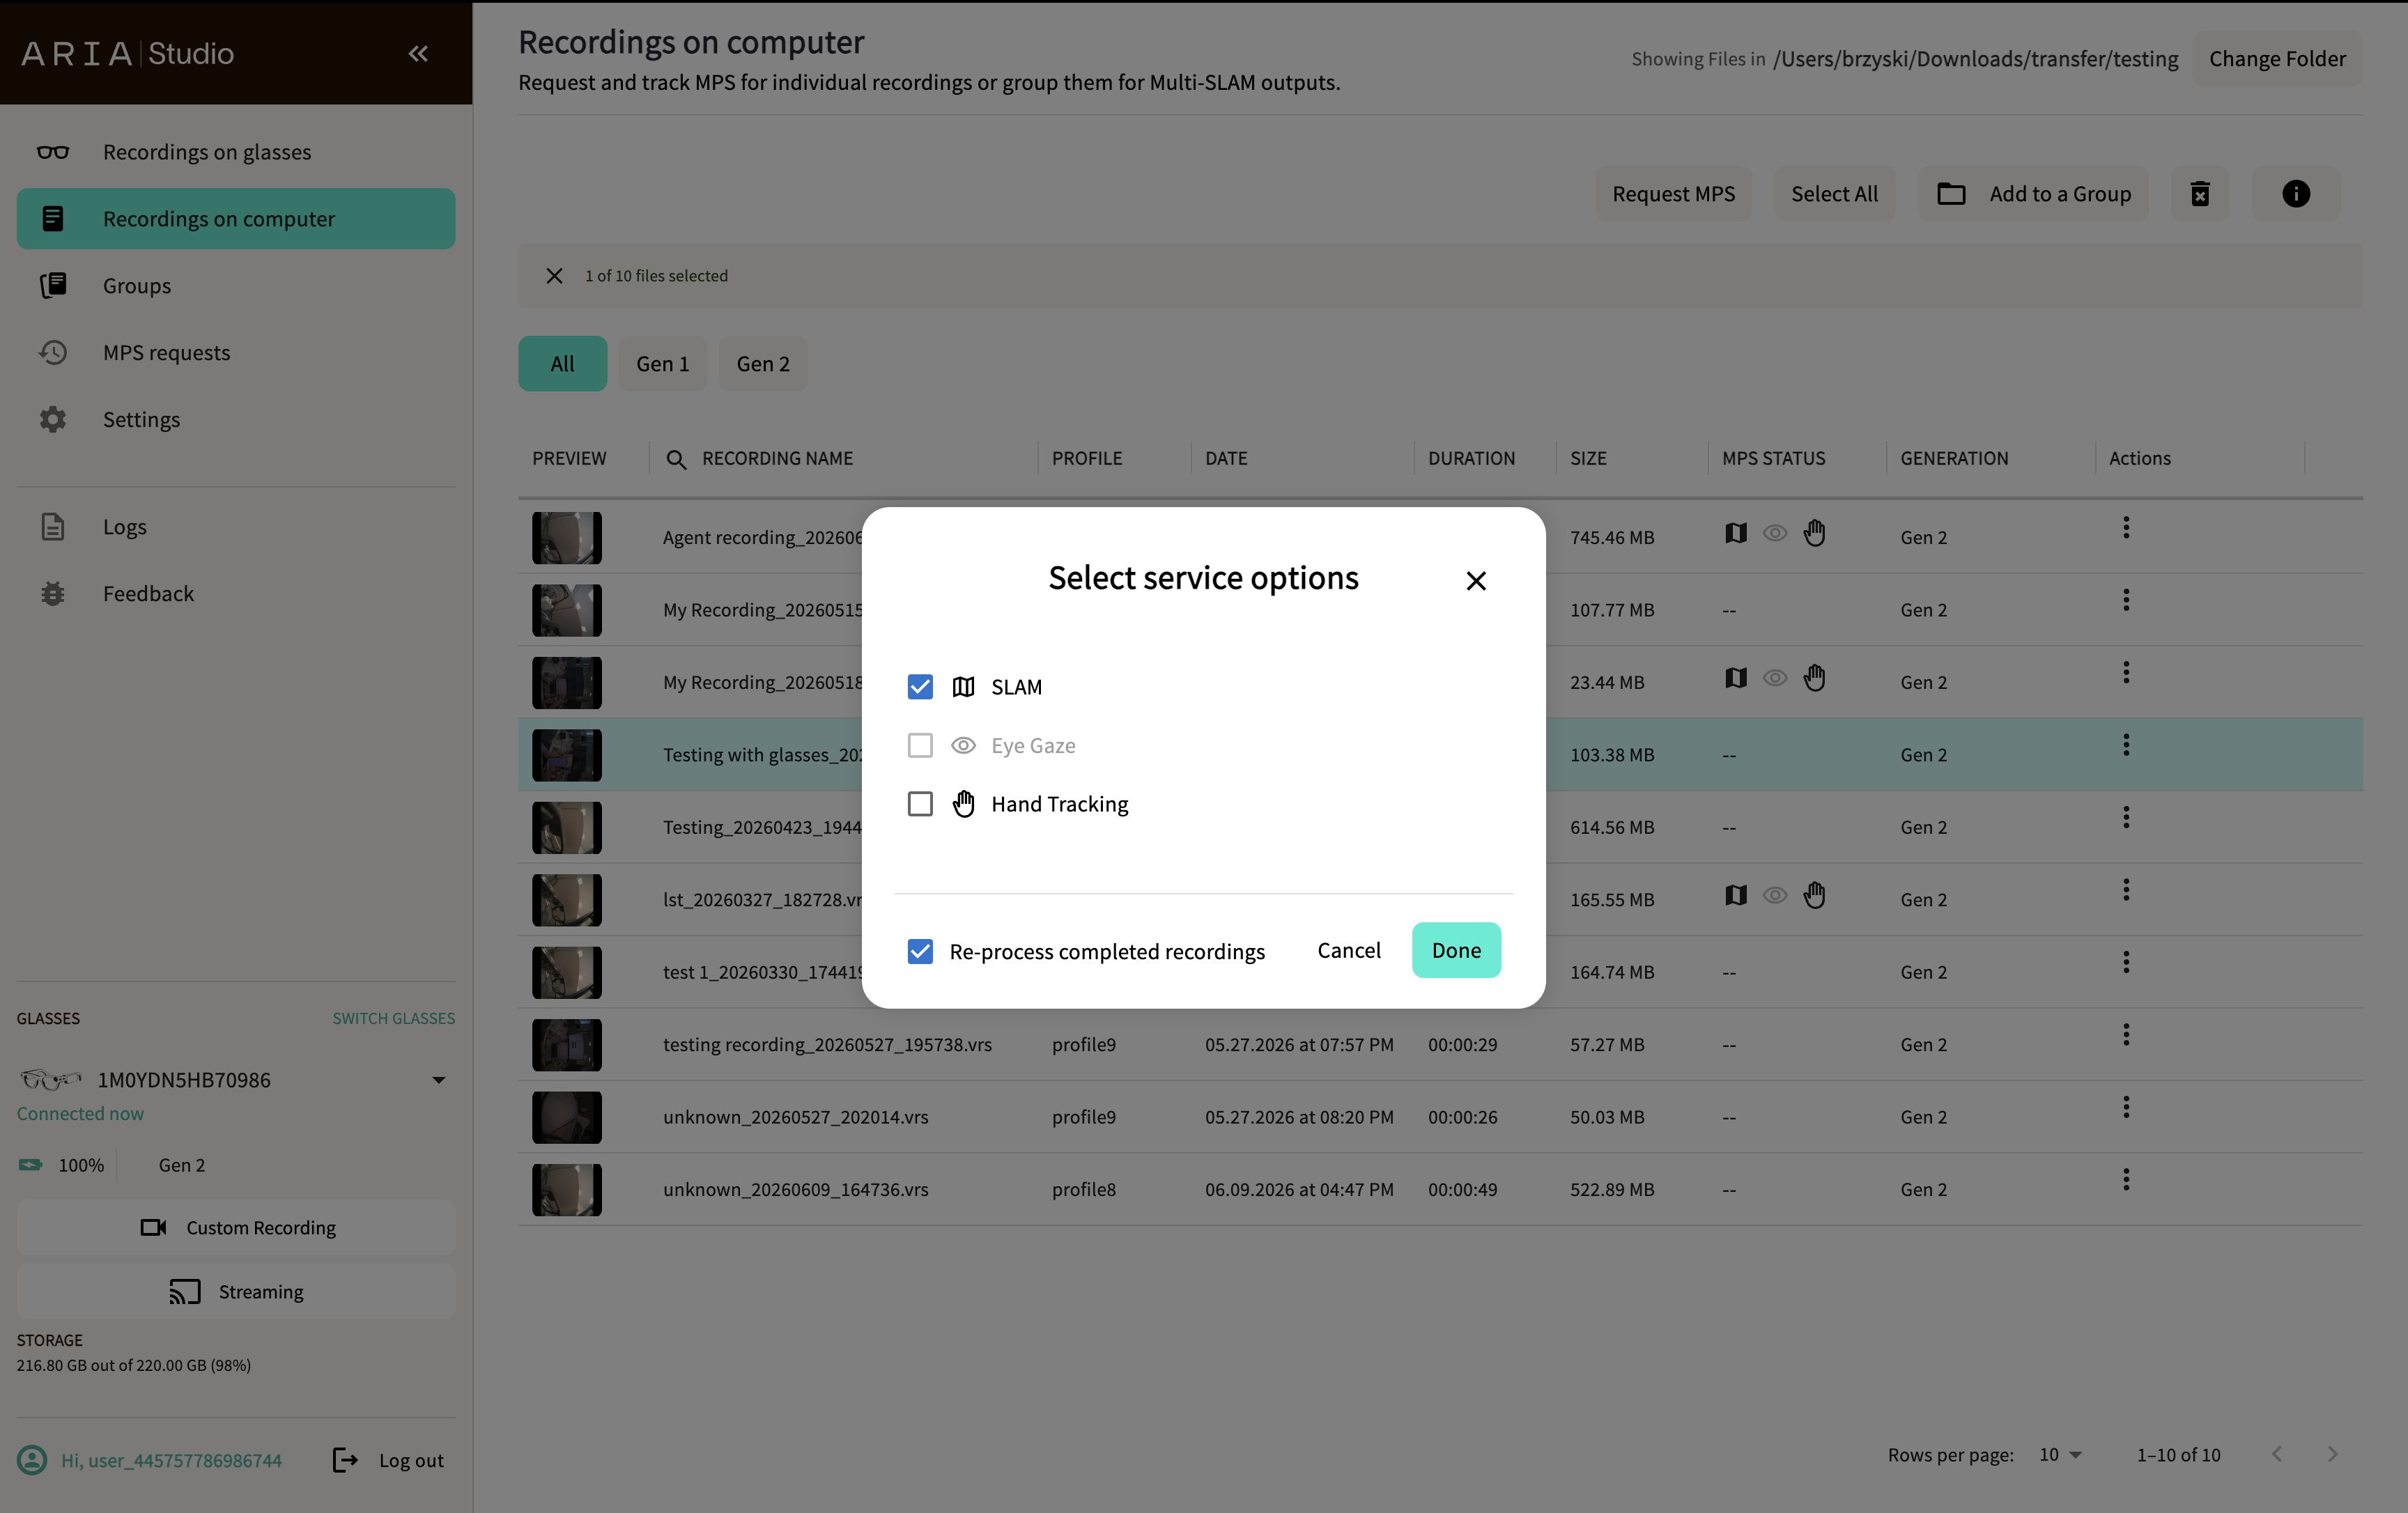
Request MPS for recordings
- Click recordings to select them (use Shift+click for a range, Ctrl/Cmd+click for multiple, or Select All).
- Select Request MPS in the header.
- In the Select service options dialog, choose the features to process:
| Feature | Description | Availability |
|---|---|---|
| SLAM | Device trajectory and 3D point cloud | Gen 1 and Gen 2 |
| Eye Gaze | Where the user is looking | Gen 1 only |
| Hand Tracking | Hand poses and gestures | Gen 1 and Gen 2 |
- Optionally check Re-process completed recordings to force reprocessing even if results already exist.
- Select Done to submit the request.
Processing happens in the cloud. You can monitor progress on the MPS Requests page.
Viewing MPS results
Once MPS processing completes, results are downloaded automatically to a folder next to your VRS file:
your-recording.vrs
mps_your-recording_vrs/
  ├── slam/
  ├── eye_gaze/
  └── hand_tracking/
Select a processed recording to visualize both the VRS sensor data and MPS outputs (trajectory, point cloud, eye gaze, hand tracking) overlaid in the Rerun viewer.
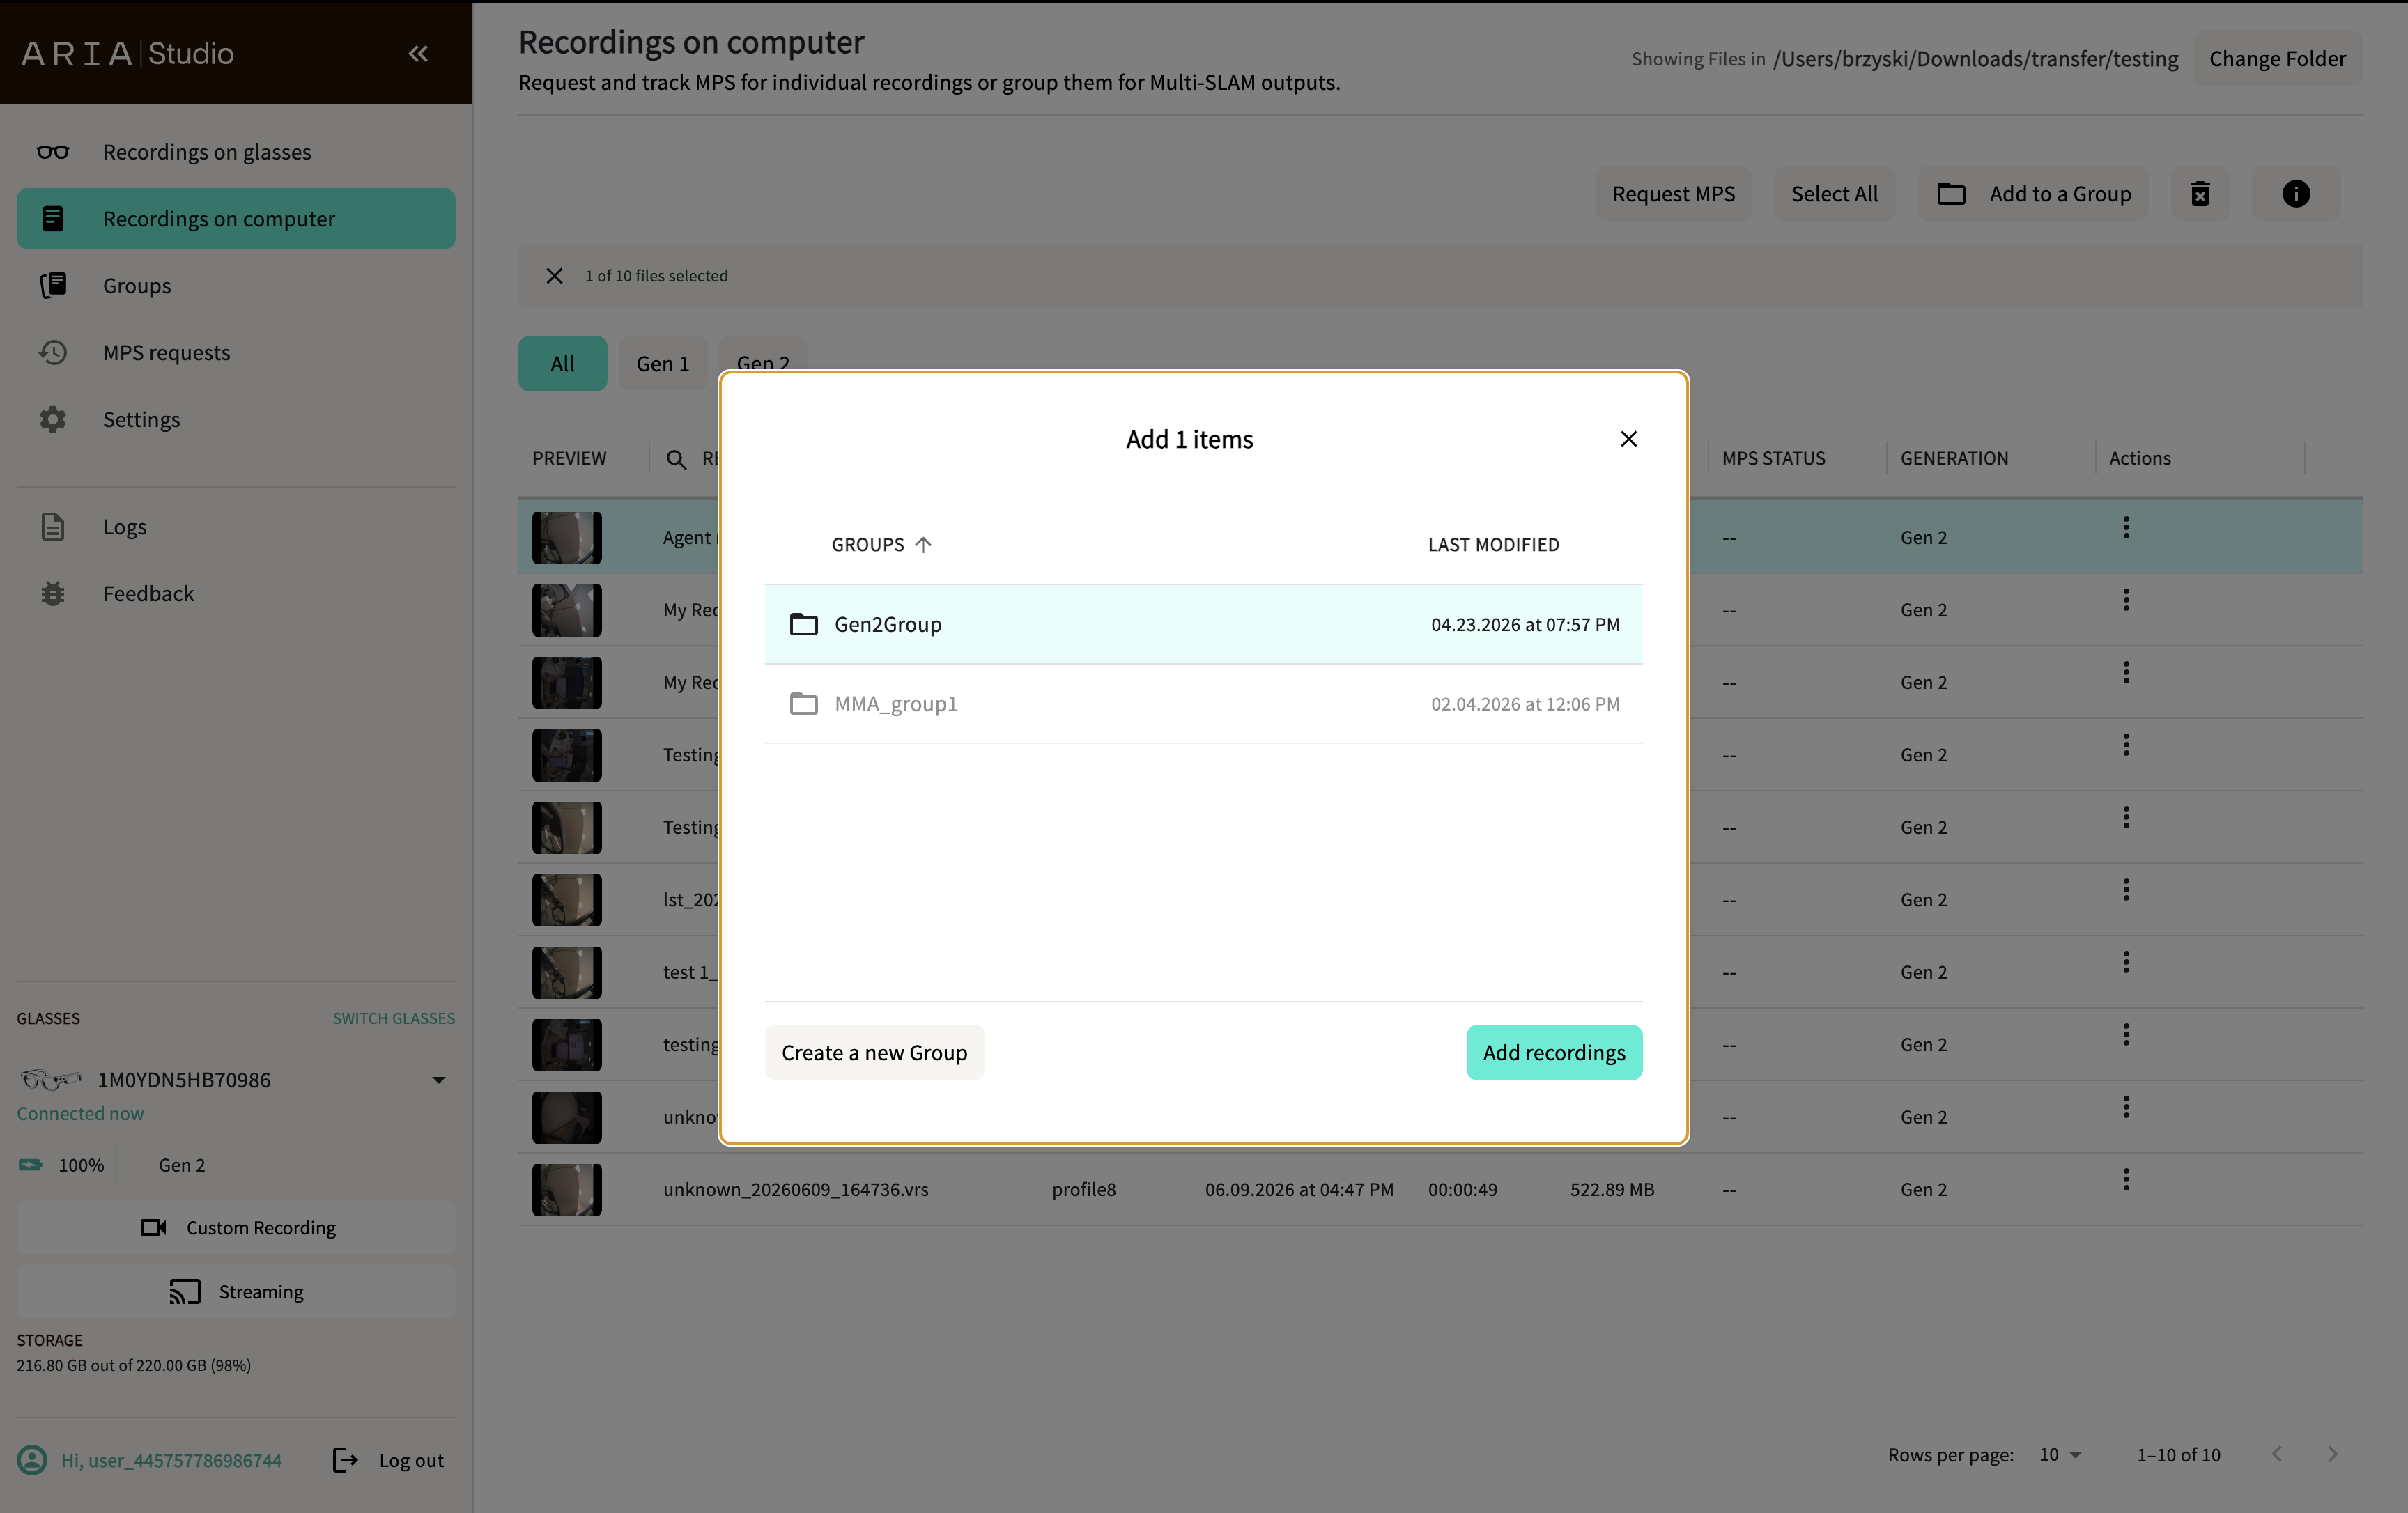
Add recordings to a group
- Select one or more recordings.
- Select Add to a Group in the header.
- Choose an existing group or select Create a new Group.
- Select Add recordings.
A confirmation dialog shows when the recordings have been added. Select Done to close it.

Only recordings of the same generation can be added to a group. If your selection mixes Gen 1 and Gen 2 recordings, the Add to a Group button is disabled.
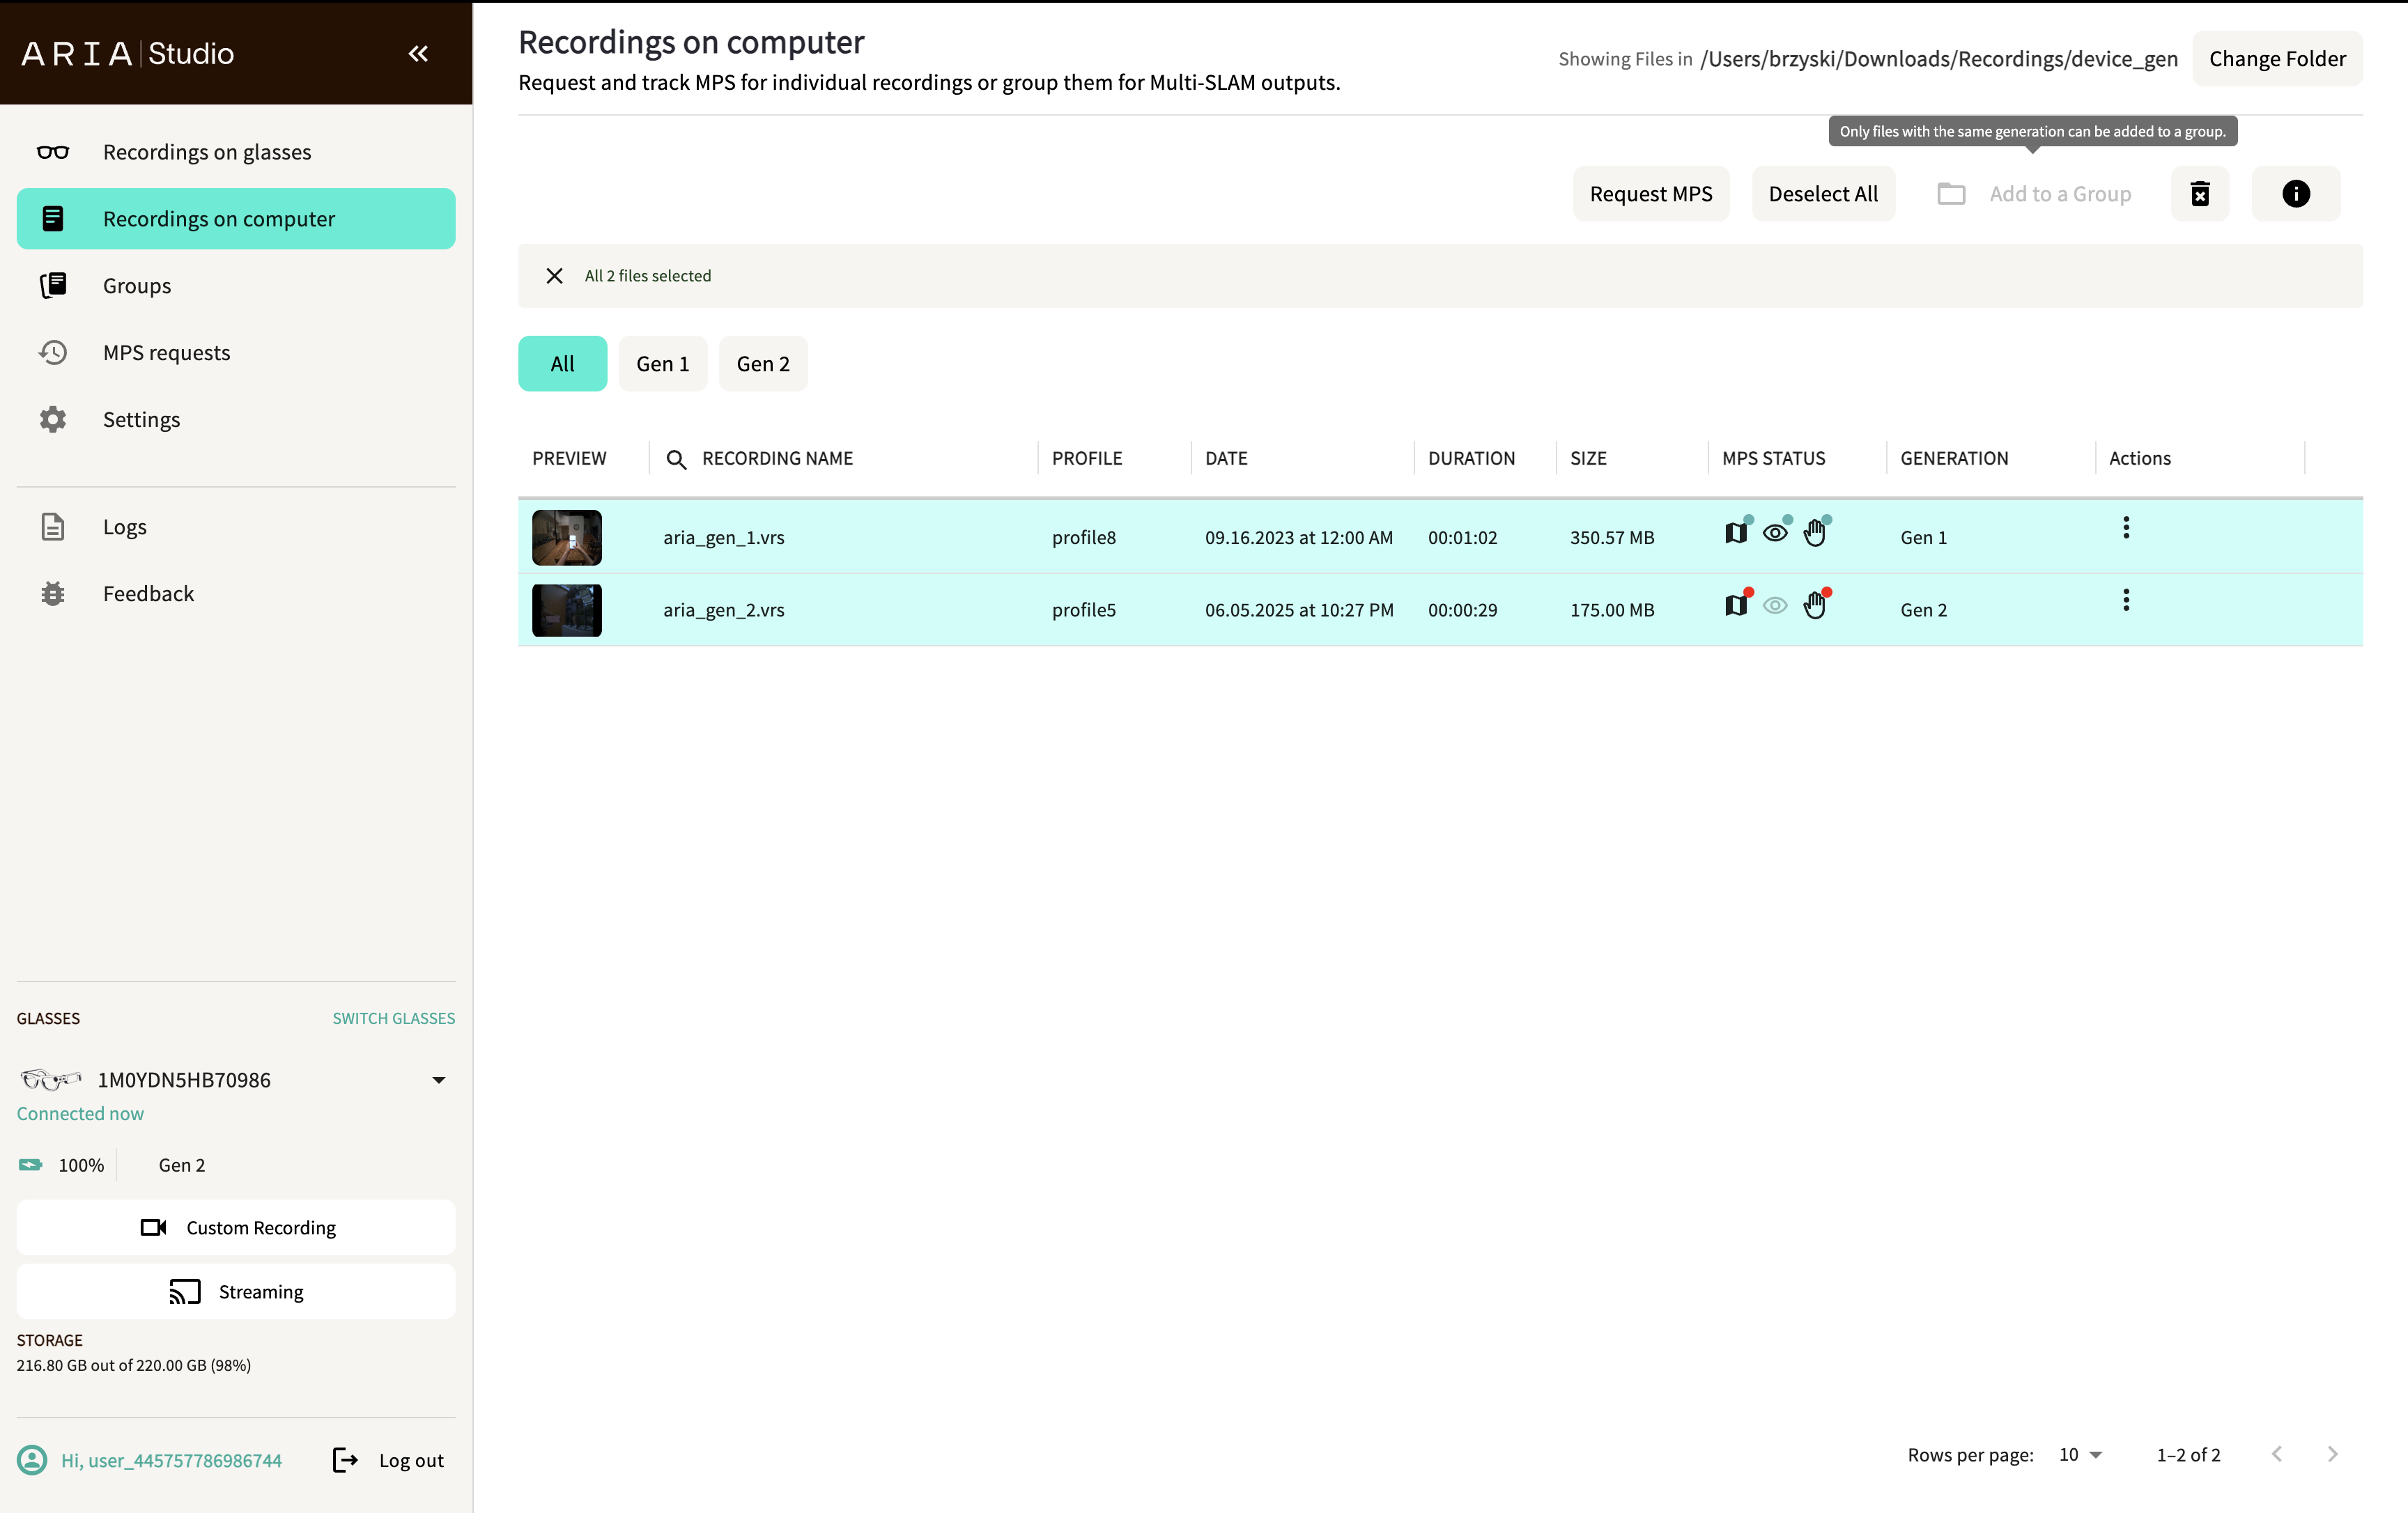
Likewise, if an existing group contains recordings of a different generation, that group can't accept the selected recordings — Add recordings stays disabled.
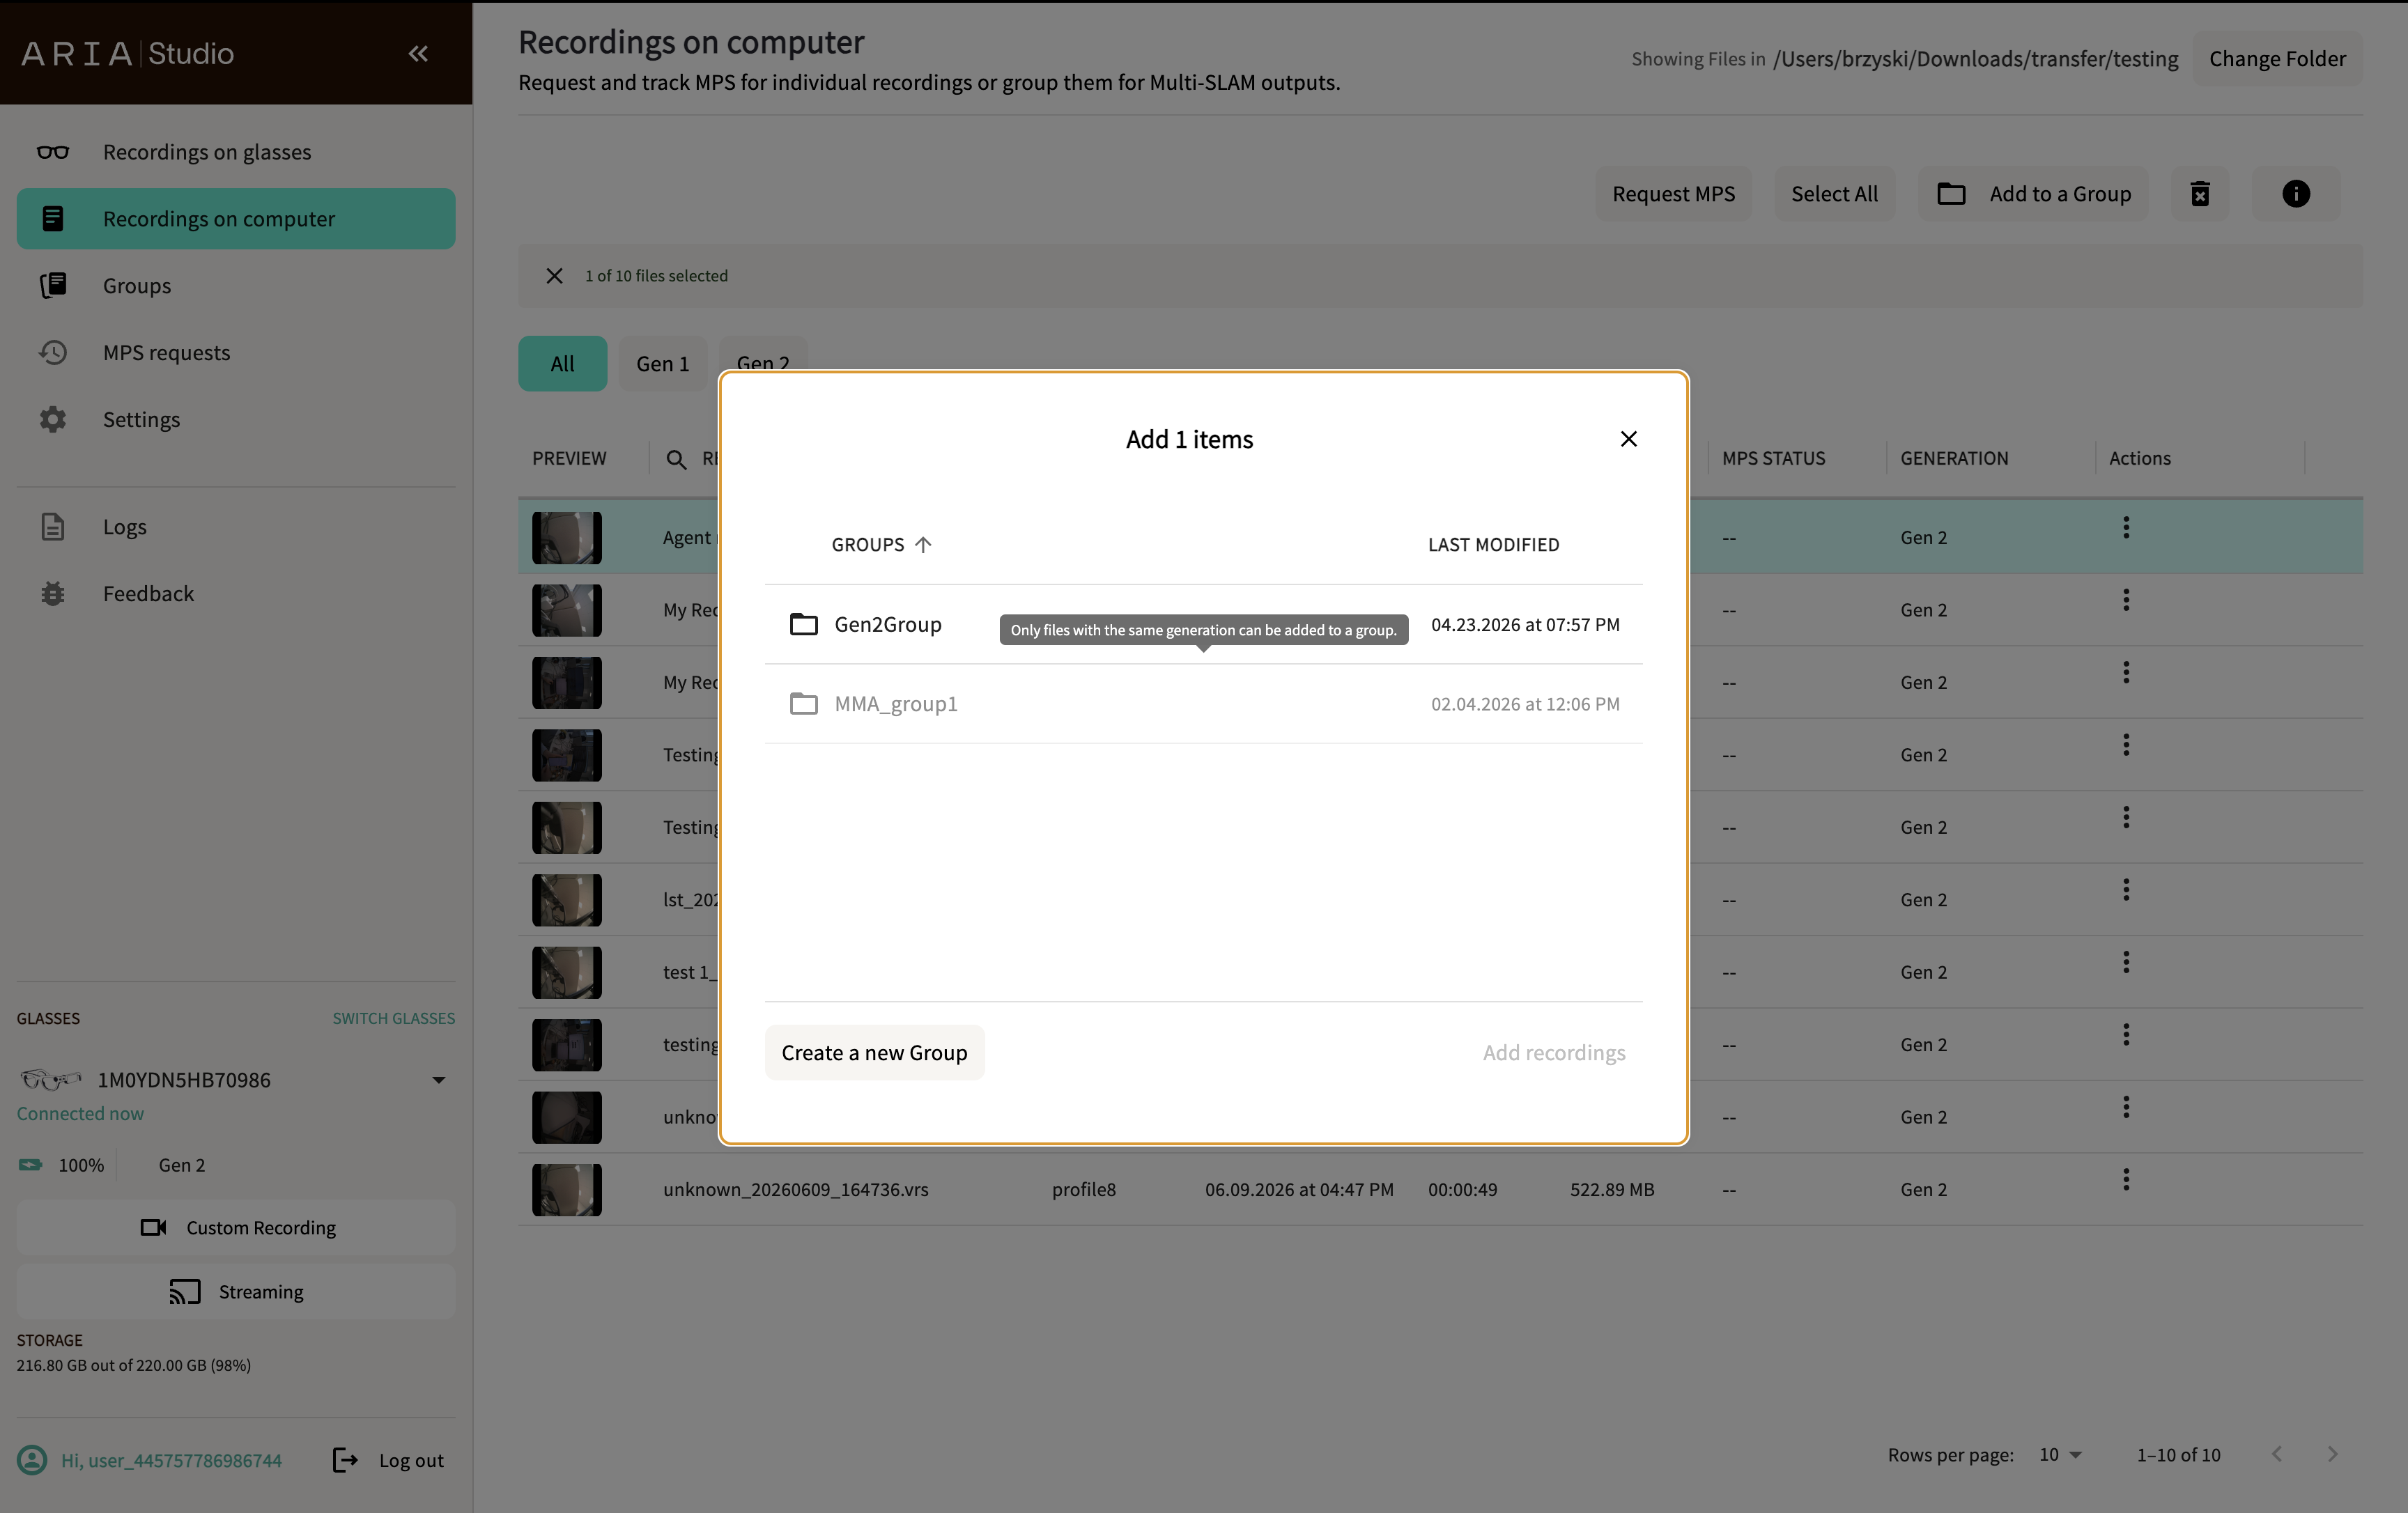
Groups are used for Multi-SLAM processing.
Delete recordings
- Select one or more recordings.
- Select the delete button in the header.
- Confirm by selecting Delete forever in the dialog.
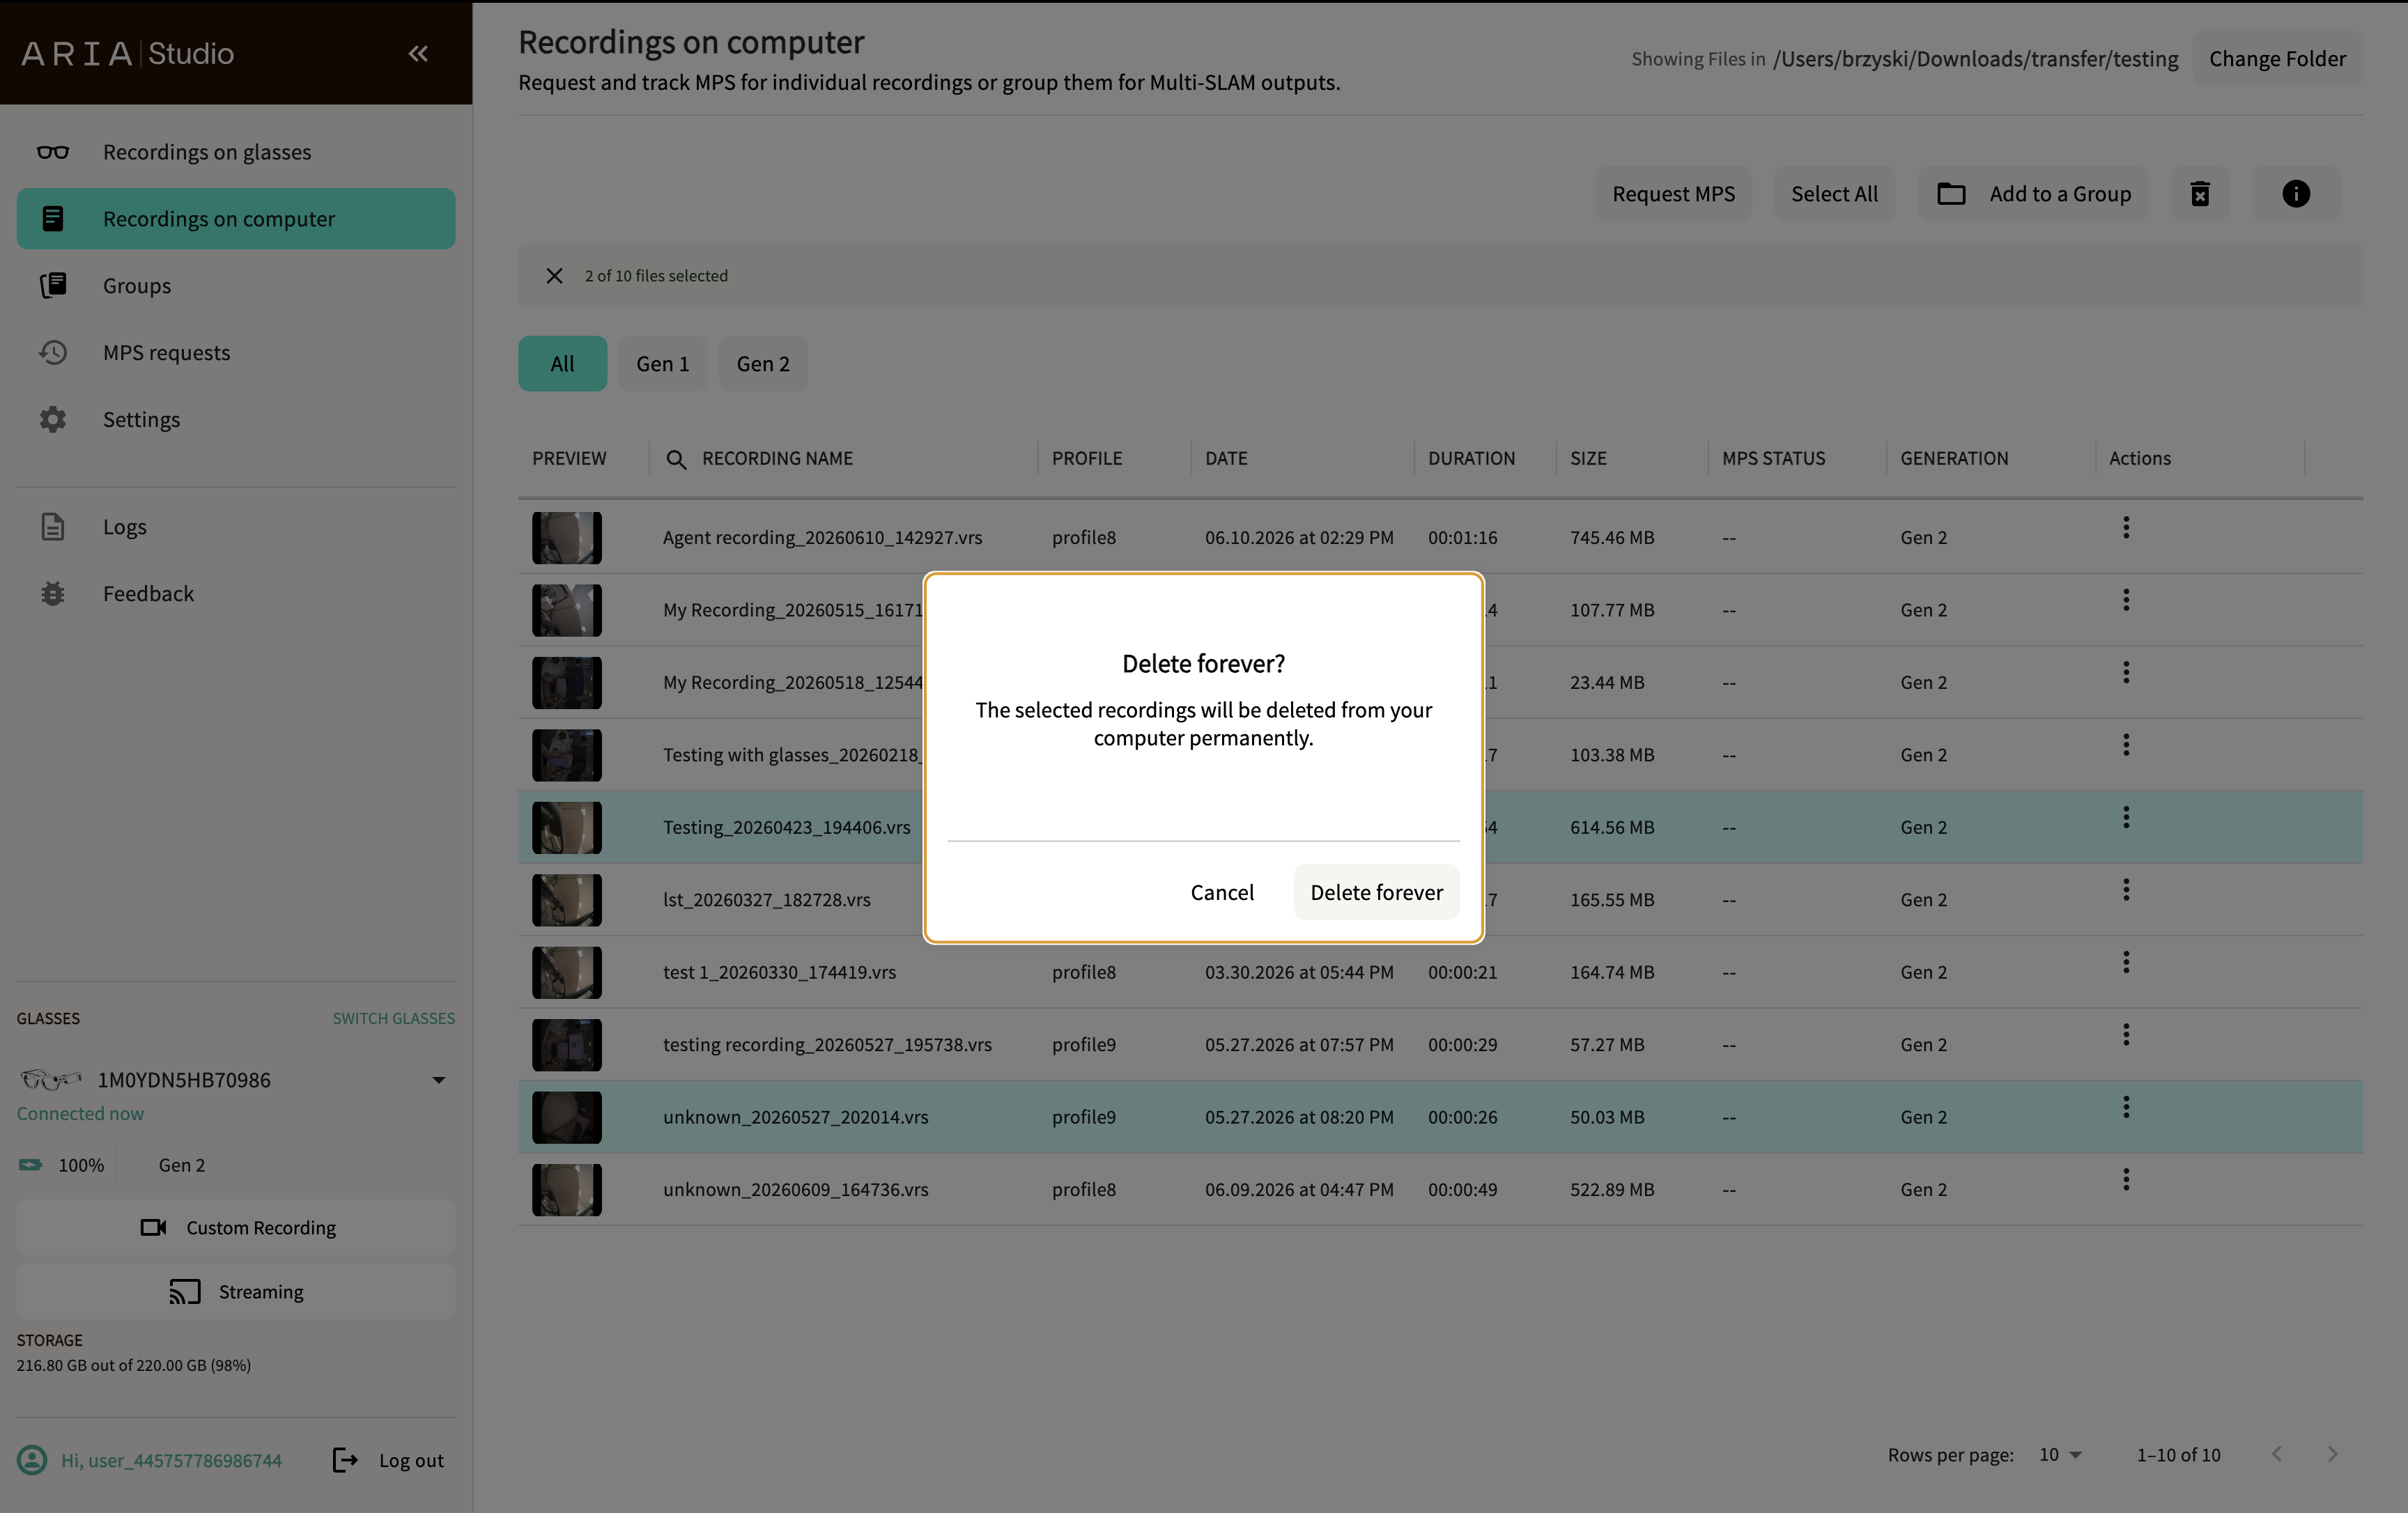
Deleted recordings and their cached data are permanently removed from your computer.