Control Recording & Streaming
The companion app allows you to start and stop recordings on your glasses, stream live sensor data to a computer, or do both in a single session. You can also view and edit recording details and manage recordings stored on your glasses.
Start a recording
- Navigate to the dashboard tab in the bottom left of your app (home icon).
- Select Custom Recording. The recording setup screen will appear. From here, you can name your recording, add notes, and select a recording profile.
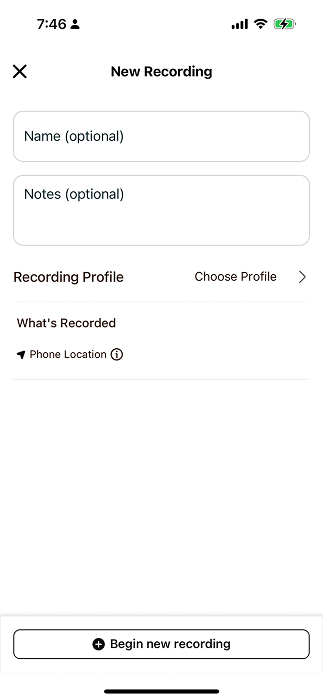
- Tap recording profile to select a profile. If you have a default profile set, it will auto-populate. Otherwise, you can select a profile from the list.
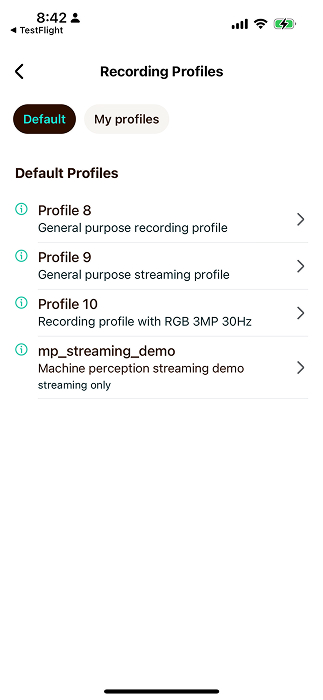
- (Optional) when selecting a profile, you can make it the default profile for future recordings.
- (Optional) tap Advanced Settings to configure additional options such as the NTP Server (see NTP Server below).
- Tap Begin new recording and you will see your glasses LED light up once recording has started.
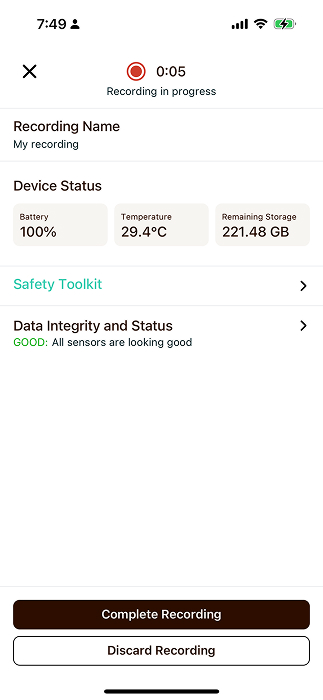
- Once you've finished recording, you can end the recording by tapping the Complete recording button in the app or by pressing the action button on your glasses. If you don't want to save your recording to the glasses, tap Discard recording.
NTP Server
NTP (Network Time Protocol) is a time synchronization mode that enables the glasses to synchronize their timestamps with an NTP server. This provides more accurate UTC timestamps in your recording data.
To enable NTP, tap Advanced Settings on the recording setup screen and toggle the NTP Server option. When enabled, the glasses will periodically sync their clock with the configured NTP server during the recording.
Enable NTP when you need:
- Accurate UTC timestamps that can be correlated with external systems or events
- Rough time synchronization across multiple devices recording simultaneously
NTP timestamps are not guaranteed to be monotonic or have a stable clock speed. Do not compute durations by subtracting two NTP-synced UTC timestamps. Use device timestamps for duration calculations instead.
Sensor integrity
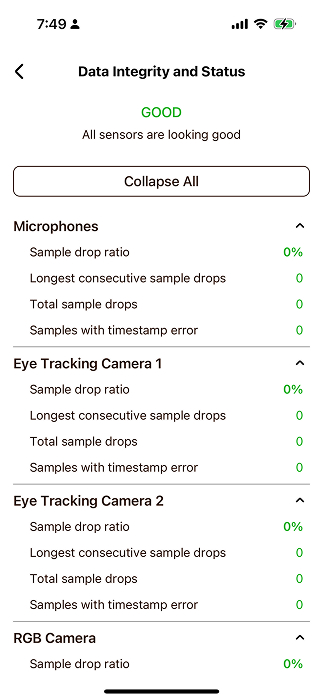
You can view the health of the sensors you are recording with by tapping the Data Integrity and Status button during a recording.
Consecutive recordings
Note that if you run multiple consecutive recordings, the app will automatically name them with a suffix of the number of recordings you've made. The number will automatically reset if you update the name field on a new recording.
Stream to a computer
The companion app can stream live sensor data from your glasses to a computer on your network — instead of, or at the same time as, recording to the glasses. The app only drives the glasses side of the session. The receiving side is the Client SDK's aria_streaming_viewer, so install the Client SDK on the computer before you start.
Choose a session type
On the dashboard tab, the Quick Actions row opens the session setup screen with a session type already selected: Custom Recording for a recording-only session, Streaming for a stream-only session, and Recording + Streaming for a combined one. Whichever tile you start from, the Session type selector at the top of the setup screen lets you switch between them:
| Session type | Records VRS to the glasses | Streams live |
|---|---|---|
| Recording | Yes | No |
| Streaming | No | Yes |
| Recording & Streaming | Yes | Yes |
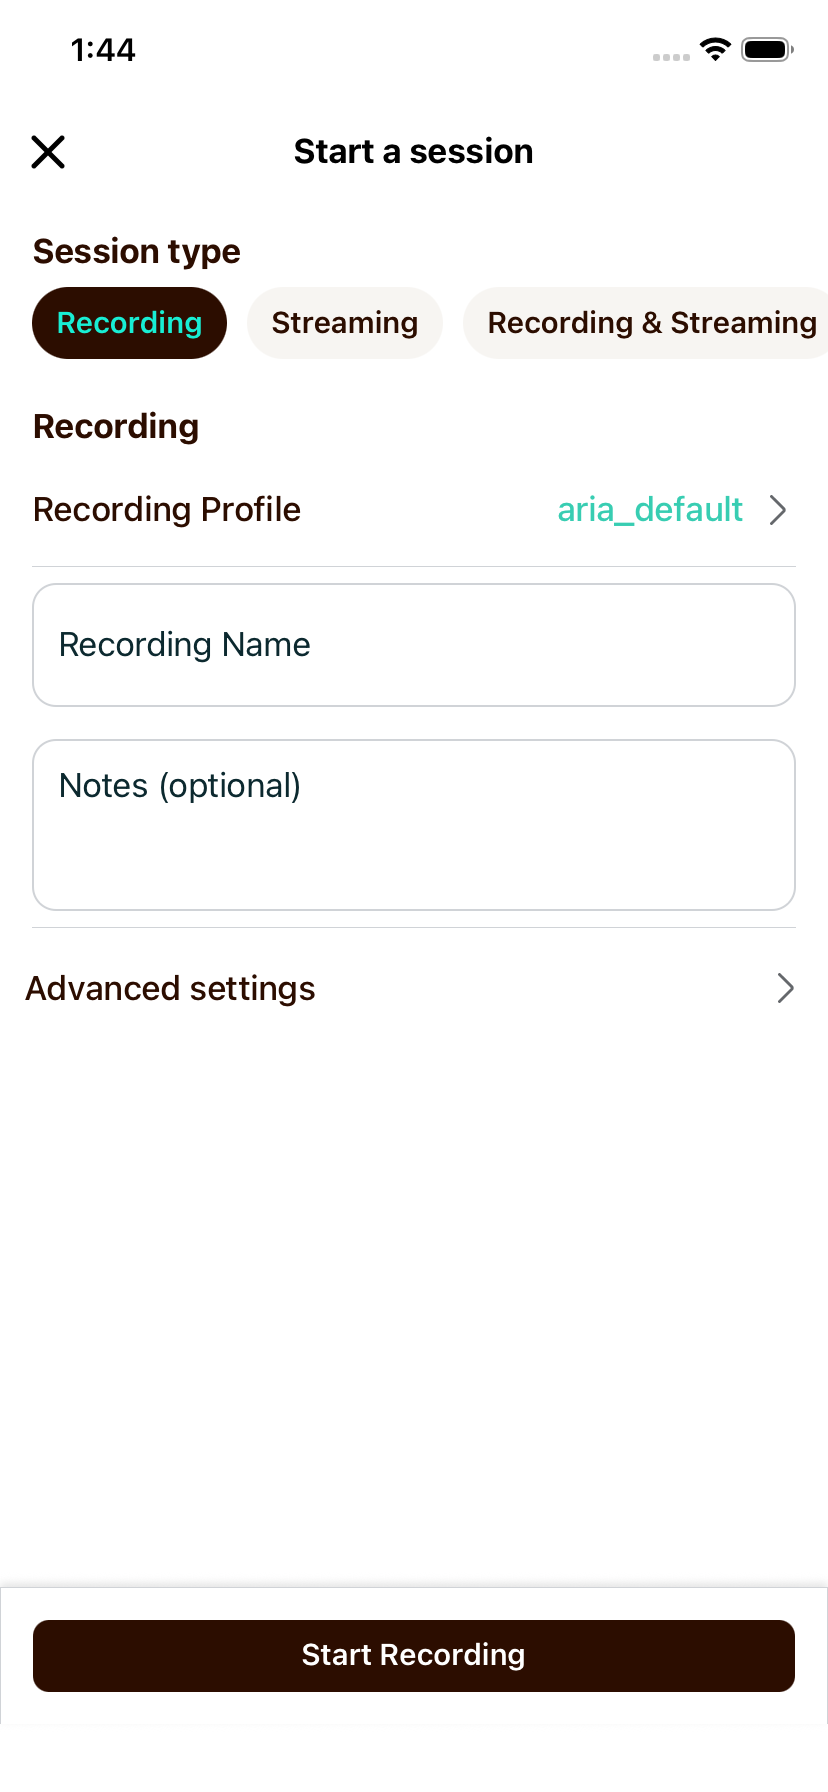
The rest of the screen shows only the settings that apply to your choice, and the button at the bottom changes to match: Start Recording, Start Streaming, or Start Recording & Streaming.
The combined type is labelled Recording + Streaming on the Quick Actions tile and Recording & Streaming on the setup screen; both refer to the same session type.
Streaming profile
A streaming session selects a Streaming Profile, which controls which sensors are streamed and at what rate. This is chosen independently of the recording profile — see Recording Profiles for how profiles work and how to customize them.
The profile you pick has a real effect on latency and on how warm the glasses get over a long session. The Client SDK documentation covers choosing a streaming profile in more detail.
Streaming protocol
Tap Streaming protocol, choose WebRTC, and tap Done.
WebRTC requires Aria Gen 2 glasses connected to Wi-Fi; the Bluetooth link to your phone carries session control, not media.
capture_timestamp_ns for the RGB, SLAM and eye-tracking video is the host receive time, because RTP carries no device capture timestamp. Everything on the data channel (IMU, VIO, eye gaze, hand pose, audio) keeps its device-clock timestamp.
The receive time is converted into the device clock, using an offset the client tracks from the data-channel sensors, so images are never delivered in the raw host clock and can be cross-correlated with the sensor streams. What that conversion does not do is recover the capture time: the value is still a receive time, late by the network and transport delay.
If your analysis depends on exact image capture times, choose Recording & Streaming and use the VRS written to the glasses, which carries true device capture timestamps throughout. See What travels on which channel.
WebRTC settings
Selecting WebRTC reveals the endpoints the glasses use to find your receiver. All of them persist between sessions.
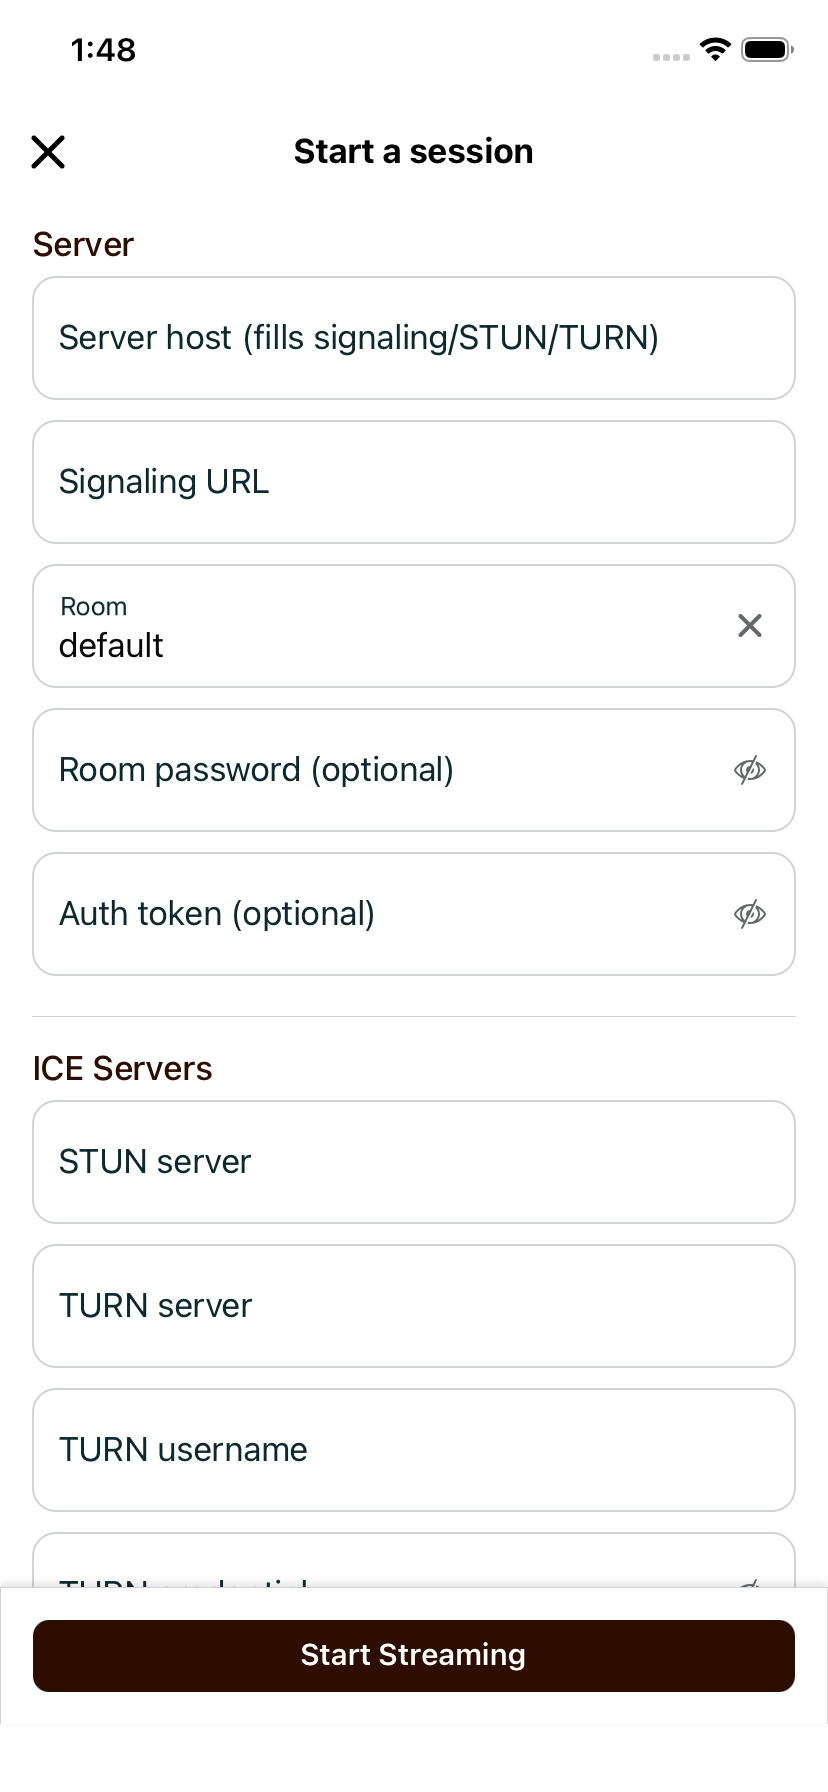
Server
| Field | What it does |
|---|---|
| Server host (fills signaling/STUN/TURN) | A convenience field. Enter a host (optionally scheme://host:port) and the app fills in the three endpoints below for you. It is write-only — it does not update when you edit those fields directly |
| Signaling URL | Where the glasses negotiate the connection, as tcp://, http:// or https://. https:// puts signaling behind TLS |
| Room | The signaling room the glasses and receiver meet in. Must match the receiver's --room |
| Room password (optional) | Shared secret for the room, if your signaling server requires one |
| Auth token (optional) | Token presented to the signaling server |
ICE Servers — only needed to cross networks:
| Field | What it does |
|---|---|
| STUN server | Helps the two peers discover a direct path through NAT |
| TURN server | Relays the media when a direct path is not possible |
| TURN username / TURN credential | Credentials for the TURN server. Scroll down to reach TURN credential |
The app checks the shape of each endpoint as you type, and each field expects its own scheme:
| Field | Expected form | Message if it looks wrong |
|---|---|---|
| Signaling URL | tcp://, http:// or https:// | Enter a tcp://, http://, or https:// URL |
| STUN server | stun:host:3478 | Enter a stun: URL |
| TURN server | turn:host:3478 | Enter a turn: URL |
These messages are advisory — they do not block you from saving, since the endpoint is only exercised when the session starts.
Advanced
| Field | What it does |
|---|---|
| PCIe batch period (ms) | How often batched data is moved across the glasses' internal PCIe link. Leave it empty to use the value carried by the selected streaming profile, which the app shows as the placeholder |
This setting governs a link inside the glasses, not how data is packed onto the network. The Client SDK documentation notes that WebRTC has no network message-batching control; that remains true, and this field does not change it. See Limitations.
For cross-network streaming you run the signaling server yourself; it ships as a separate PyPI wheel. See Deploying a Signaling Server. On a single network you do not need one — point the app's Signaling URL at the computer running the viewer, and the viewer acts as the signaling endpoint itself.
Same-network example
On the computer, start the viewer listening on a port:
aria_streaming_viewer --transport webrtc --listen 9000
In the app, set Signaling URL to tcp://<computer-ip>:9000 — the port must match --listen — select your streaming profile, and tap Start Streaming. The two can be started in either order; the glasses retry until the viewer is up.
Record while streaming
Choosing Recording & Streaming captures a full-rate VRS on the glasses for the duration of the stream. This is the combination to use when the live view is for monitoring or interaction but your analysis needs complete, device-timestamped data.
The two sides are configured independently: Streaming Profile controls what goes over the network, and Recording Profile controls what is written to the glasses. They do not have to match — you can stream a light profile to keep latency and heat down while recording everything.
A combined session is stopped with a single button, Stop Recording & Streaming, which ends the stream and closes the recording together. A stream-only session ends with Stop Streaming, and no file is written to the glasses. The recording from a combined session then appears under the Recordings tab like any other, and the usual recording controls — storage, discard, saved copy — are available during the session.
Remote expert sessions
A common use of WebRTC streaming is to put a remote colleague in the loop: the wearer streams their point of view from the field, and a remote expert watches it live and talks the wearer through a task. WebRTC is the right transport for this because it adds low latency, an audio path in both directions, and the ability to reach a viewer on a different network.
To set one up:
- The remote expert runs
aria_streaming_viewer --transport webrtcon their computer, pointed at a signaling server both sides can reach (see Cross-network). - The wearer selects Streaming — or Recording & Streaming, to keep a full-rate capture of the session — sets Streaming protocol to WebRTC, enters the same Signaling URL and Room, and taps start.
- Audio flows both ways for the duration of the session, so the expert can talk to the wearer while watching their view.
See WebRTC Streaming for the receiver-side options, including terminal audio controls and limitations.
Streaming troubleshooting
If a session will not start or stop, see Companion App Troubleshooting.
Manage recordings
Tap the Recordings tab in the bottom of your app (second from the left) to view recordings stored on your glasses.
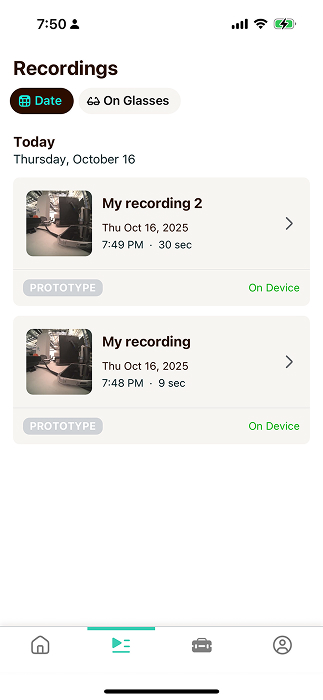
View recording details
Tap a recording to view its details. From here, you can view the recording's name, date, duration, thumbnails, and other useful metadata.
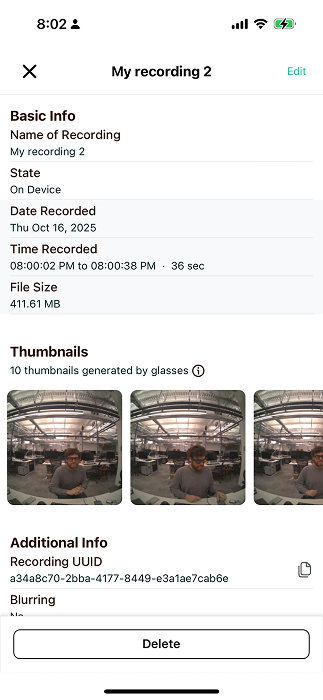
Rename a recording
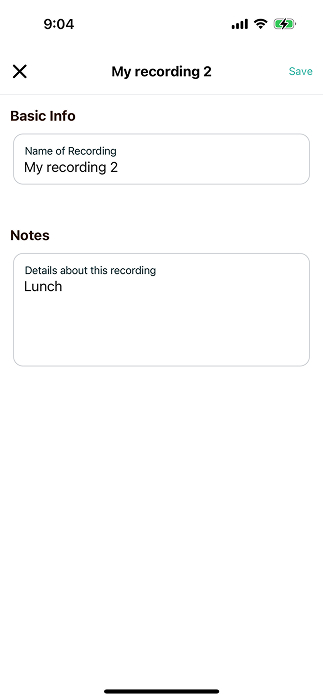
Tap the Edit button to rename a recording. You can also add or edit notes on this screen. Tap Save to save your changes.
Delete a recording
Tap the Delete button to permanently delete a recording from your glasses.
Next Steps
Now that you can control recording and streaming on your glasses, learn how to record and stream over the command line, or download recordings to your computer, using the ClientSDK.
- WebRTC Streaming — the receiver side of a WebRTC session
- Eye Tracking Calibration — personalize gaze estimates before a session