Live Preview
Live Preview shows what your Aria Gen 2 glasses' cameras see, live in the Companion App. Use it to check how the RGB camera frames the scene, and what the SLAM and eye-tracking cameras see, before you start a recording.
Live Preview streams straight from your glasses to your phone over a direct Wi-Fi link, so it doesn't need a Wi-Fi network, a computer or the Client SDK. It doesn't record anything: nothing is saved to the glasses or to your phone. To stream sensor data to a computer instead, see Stream to a computer.
Requirements
- Companion App v290 or later
- Aria Gen 2 glasses connected to the app and running the latest glasses OS. The Live Preview tile only appears when your glasses' OS supports it. If you don't see it, update your glasses
- Your phone's Wi-Fi turned on. Neither your phone nor your glasses need to join a Wi-Fi network
- iOS: iOS 26 or later, on an iPhone that supports Wi-Fi Aware
- Android: on Android 13 and later, the Nearby devices permission for the Aria app
Open Live Preview
- On the dashboard tab (home icon), check that your glasses show as connected.
- Swipe the Quick Actions row to the left and tap Live Preview.
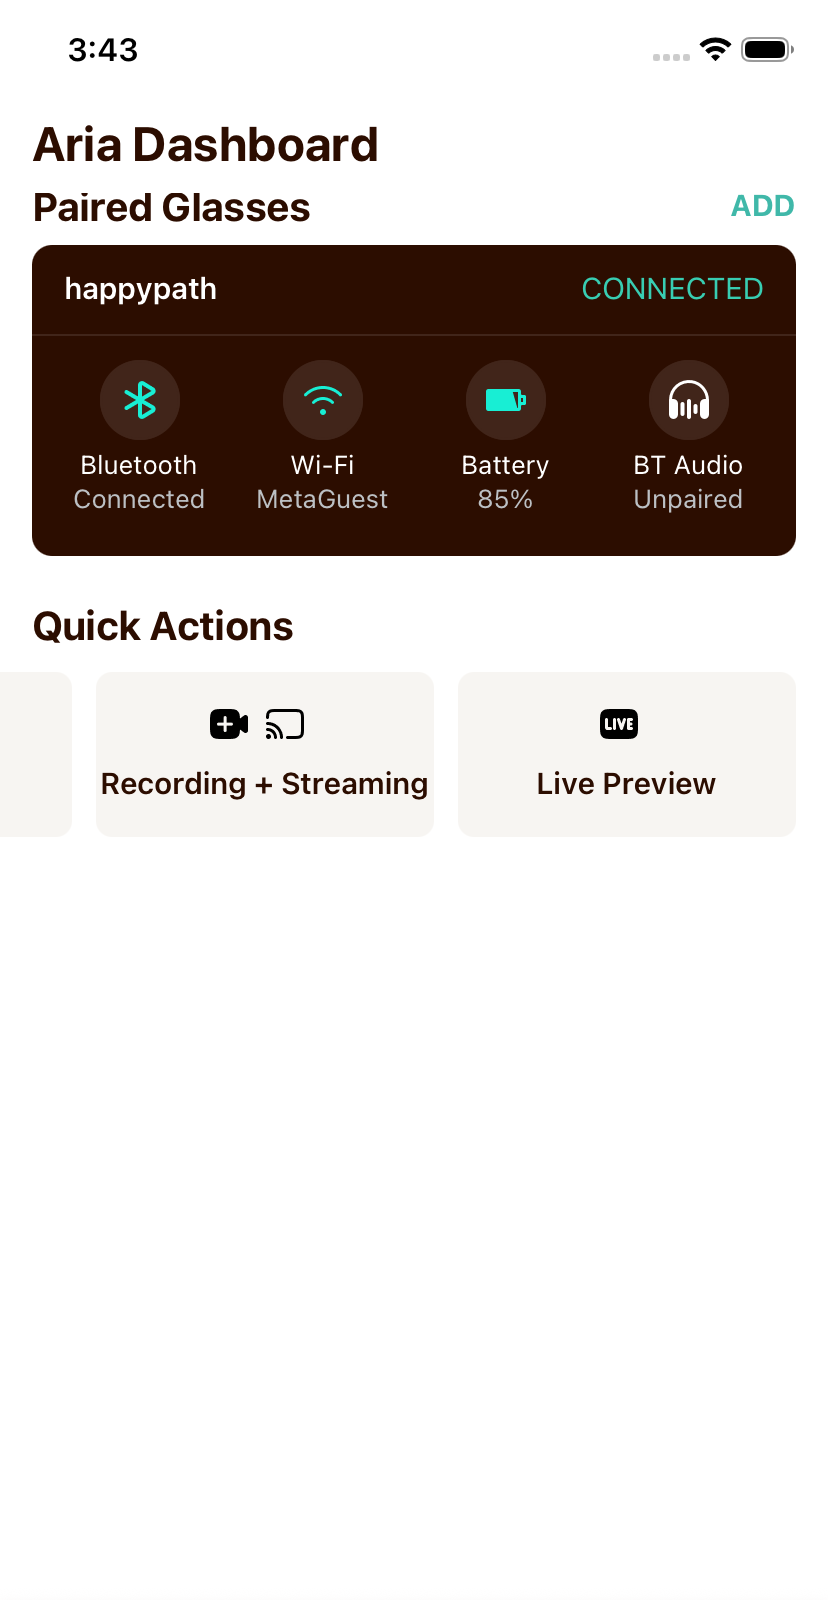
Live Preview uses the glasses' streaming session, so it can't run alongside a recording or another stream. If a session is running when Live Preview connects, the app stops it first. Complete your recording before you open Live Preview.
Set up Live Preview
The first time you open Live Preview, it shows a three-step checklist. Each step shows a spinner while it runs and a check mark when it's done.
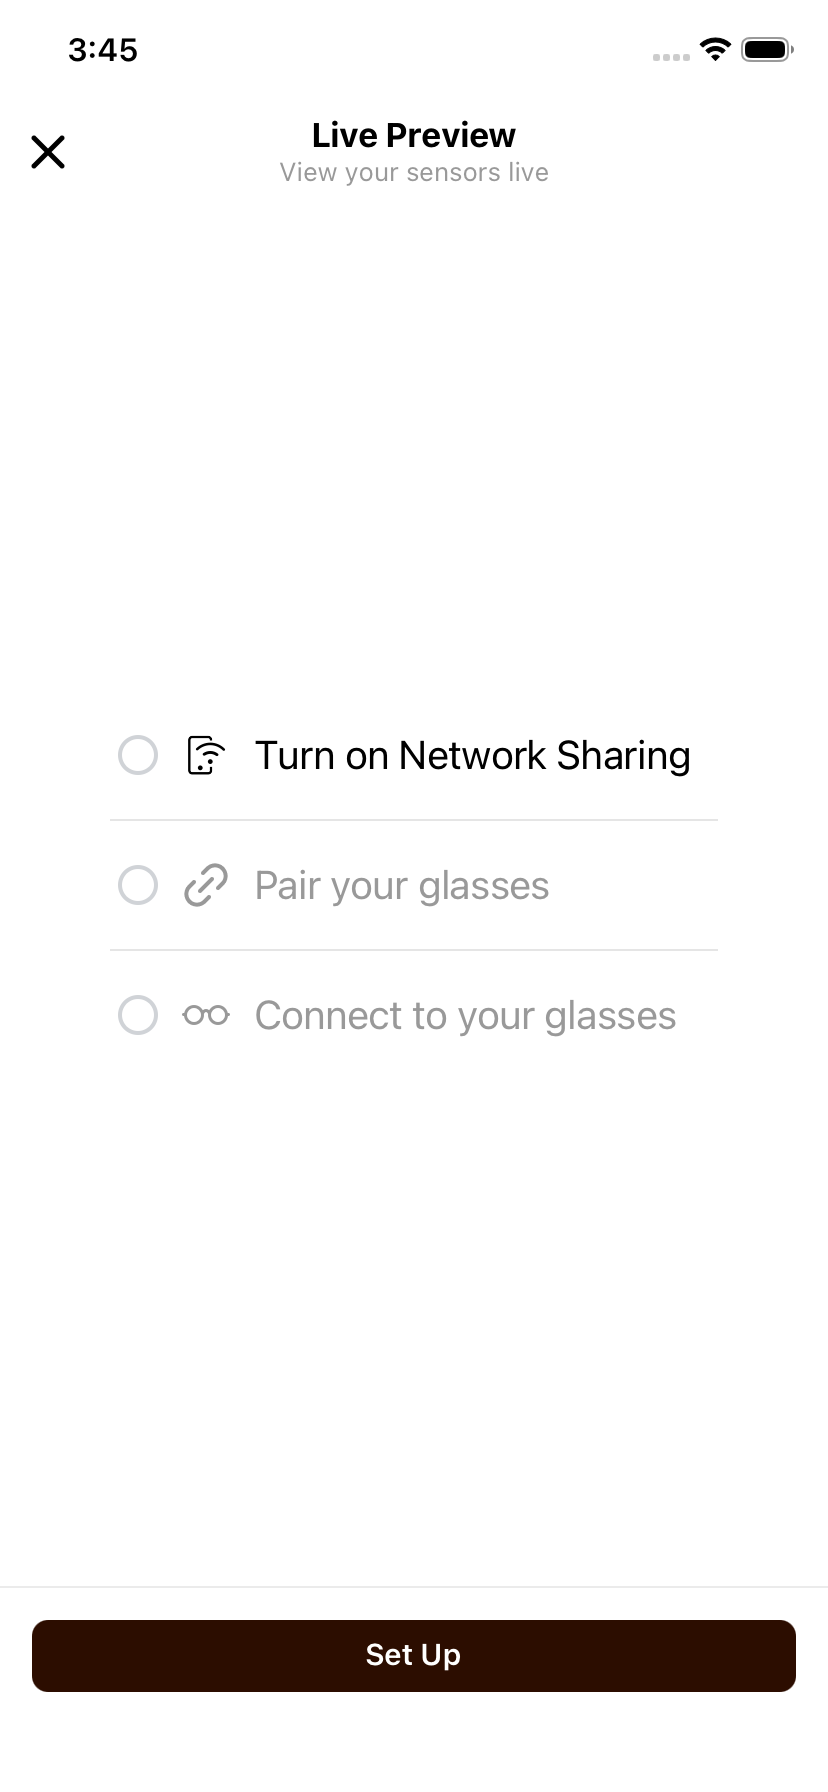
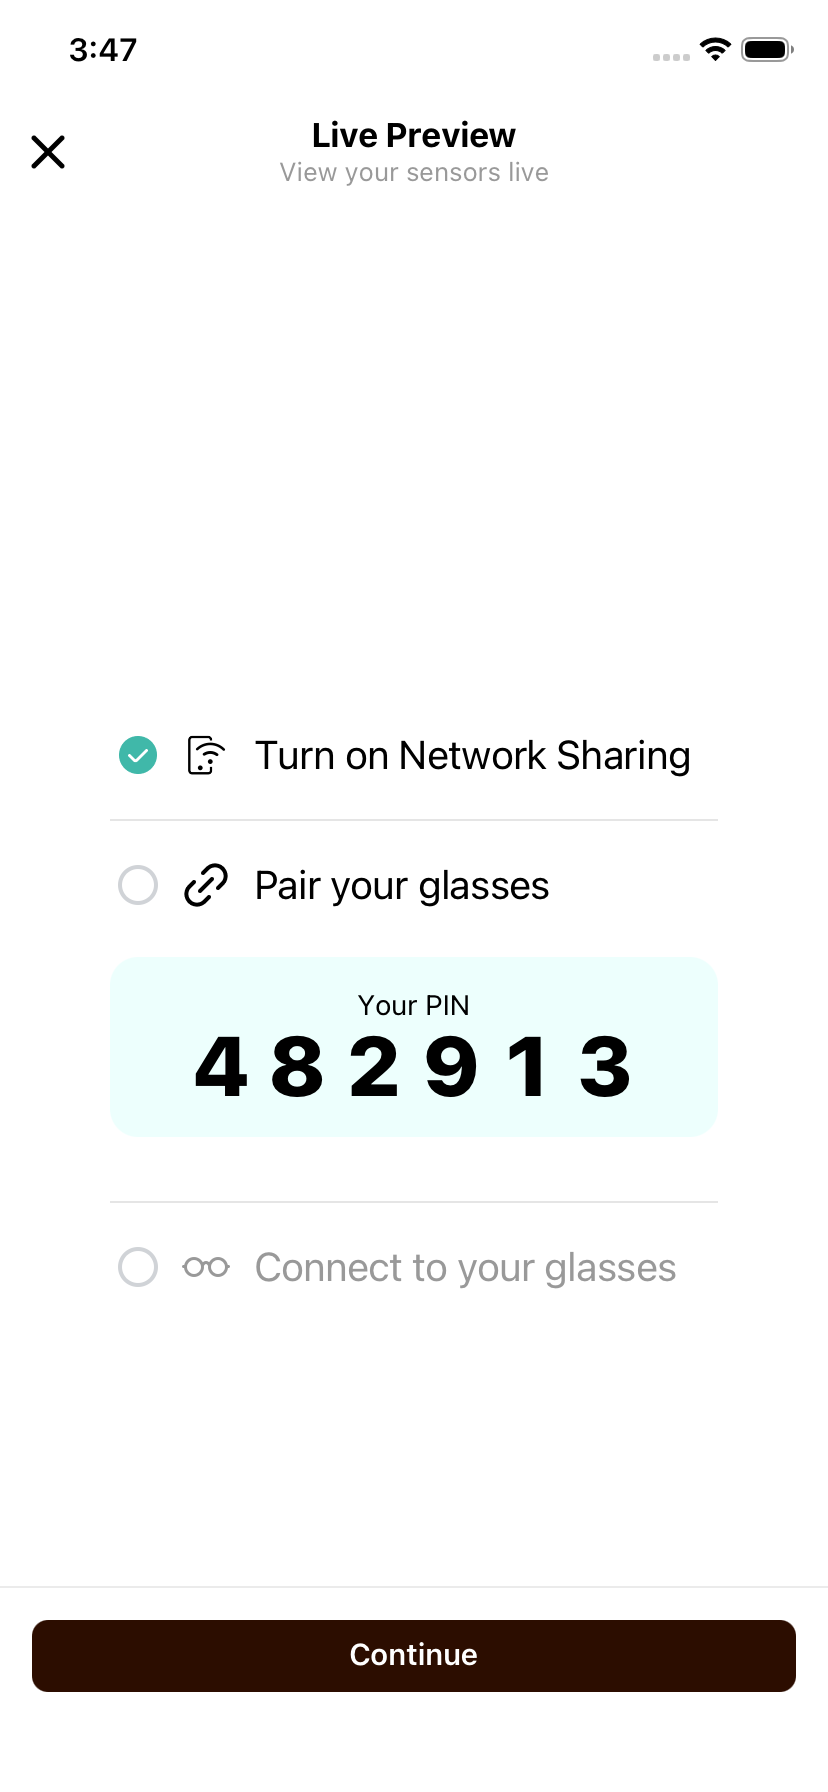
Tap Set Up on iOS, or Turn On Network Sharing on Android. The app then works through the steps in order:
- Turn on Network Sharing. Network Sharing creates the direct Wi-Fi link between your phone and your glasses: Wi-Fi Aware on iPhone, Wi-Fi Direct on Android. Live Preview streams over this link.
- Pair your glasses (iOS only). A PIN from your glasses appears in this step. Note the PIN, tap Continue, and enter it when iOS asks you to pair your glasses. On Android, this step reads Use a non-corporate Wi-Fi instead, and the app checks it by itself.
- Connect to your glasses. The app connects to your glasses and starts the stream.
You only need to set up once. The next time you open Live Preview, it goes straight to Connect to your glasses.
If a step fails, it shows what went wrong and a button to try again. See Companion App Troubleshooting.
Live Preview leaves Network Sharing on, which is what lets it skip setup next time. While it's on, glasses that aren't connected to a Wi-Fi network can reach the internet through your phone, which may use your mobile data. When this happens, the Wi-Fi status on the dashboard's glasses card reads Network Sharing.
View the cameras
Once connected, Live Preview shows all seven cameras on the glasses:
| View | Camera |
|---|---|
| RGB Camera | The point-of-view RGB camera. Its label also shows the frame rate your phone is receiving |
| SLAM Front Left, SLAM Front Right | The front-facing SLAM (computer vision) cameras |
| SLAM Side Left, SLAM Side Right | The side-facing SLAM cameras |
| ET Left, ET Right | The eye-tracking cameras |
- Full screen: tap a camera, or the full-screen button in its corner, to view it full screen in landscape. The SLAM and eye-tracking cameras open full screen as a pair. Tap ✕ to return.
- Machine perception overlays: expand Machine Perception Verticals at the top of the screen to turn the Hand tracking and Eye tracking overlays on the RGB view on or off. Both are on by default.
Live Preview uses a fixed preview stream, whichever recording profile you have selected: the RGB camera at 20 fps, and the SLAM and eye-tracking cameras at 10 fps. Use it to check your view, not as a sample of what a recording will contain.
Streaming all seven cameras warms the glasses, so close Live Preview once you've checked your setup.
Close Live Preview
Tap ✕ to stop the stream and return to the dashboard.