Quick Start
This guide will help you run your first Meta Agents Research Environments (ARE) scenario in just a few minutes. We’ll walk through the basic steps to get you up and running quickly.
Understanding Scenarios
Scenarios are designed to simulate real-world tasks that an agent might encounter. A scenario is more than just a task description. It’s a complete simulation setup that includes:
Initial Environment State: How the world looks when the scenario starts
Available Applications: Which tools the agent can use
Dynamic Events: Things that happen during the scenario execution
Task Definition: What the agent needs to accomplish
Validation Logic: How success is measured
By running a scenario, you’ll see how the agent interacts with the environment, makes decisions, and completes the task. Scenarios are the base of the agent benchmarking process, so understanding them is crucial for effective testing.
Prerequisites
Before you begin, make sure you have:
Python 3.12 or higher
uvx installed (comes with uv - see uv installation guide)
An API key for your chosen model provider (optional for basic testing)
Note
We recommend using uvx to run the Agents Research Environments commands without installing the package locally. If you want to dig deeper into the library or develop custom scenarios, you can install it locally (see Installation).
Your First Scenario
Let’s run a simple scenario to see ARE in action.
Step 1: Check Available Commands
First, verify that you can run ARE commands:
uvx --from meta-agents-research-environments are-run --help
You should see the help output with available options.
Step 2: Run a Basic Scenario
Run a simple scenario with the default agent:
uvx --from meta-agents-research-environments are-run -s scenario_find_image_file -a default --provider mock
This command:
-s scenario_find_image_file: Specifies the scenario to run-a default: Uses the Meta OSS agent--provider mock: Uses the mock model provider (no API calls) - this will return fake inference calls, your scenario will run but the task will fail
Hint
In the following command example, we omit uvx –from meta-agents-research-environments to make it easier to read. If you do not want to run through the installation guide, keep using uvx –from meta-agents-research-environments in your commands.
Step 3: Understanding the Output
When you run the scenario, you’ll see:
Initialization: The environment and apps are set up
Agent Actions: The agent’s reasoning and tool calls
Environment Updates: How the environment responds to actions
Results: Whether the scenario was completed successfully
Example output:
======== New task for base_agent ========
Received at: 1970-01-01 00:00:00
Sender: User
Message: I need to find the image file in the current directory

Starting iteration 0...
===== Output message of the LLM: =====
Thought: To find the image file in the current directory, I need to list all the files in the current directory and then filter ...

Action:
{
  "action": "SandboxLocalFileSystem__ls",
  "action_input": {
    "path": ".",
    "detail": true
  }
}

Calling tool: 'SandboxLocalFileSystem__ls' with arguments: {'path': '.', 'detail': True}
Starting iteration 1...
===== Output message of the LLM: =====
Thought: The output of the SandboxLocalFileSystem__ls tool shows a list of files in the current directory. I need to filter ...

Action:
{
  "action": "AgentUserInterface__send_message_to_user",
  "action_input": {
    "content": "The image file in the current directory is llama.jpg"
  }
}

Calling tool: 'AgentUserInterface__send_message_to_user' with arguments: {'content': 'The image file in the current directory is llama.jpg'}
Terminated turn 1 over 1
Max iterations reached - Stopping Agent: after 1 turns
Running with Different Models
The agent needs a model to work, to use a specific model for the inference, you’ll need to configure your environment and provide API credentials.
You can use ARE with the llama-api, get your model key from the developer site.
export LLAMA_API_KEY="your-api-key-here"
are-run -s scenario_find_image_file -a default --model Llama-4-Maverick-17B-128E-Instruct-FP8 --provider llama-api
Important
Before using Hugging Face providers, you need to login to Hugging Face first:
huggingface-cli login
For more details, see the Hugging Face CLI documentation.
are-run -s scenario_find_image_file -a default --model meta-llama/Llama-3.3-70B-Instruct --provider hyperbolic
If you are running a local model with an OpenAI compatible API, you can use the local provider.
are-benchmark run --hf meta-agents-research-environments/gaia2 --hf_split validation \
--model your-local-model --provider local \
--endpoint "http://localhost:8000" --agent default
You can connect to other providers or your local model via liteLLM and openai compatible APIs. See the LLM Configuration Guide guide for more details.
Using the GUI
For a more interactive and visual experience, the Agents Research Environments provides a comprehensive web-based GUI. The interface allows you to explore scenarios, monitor agent behavior, and debug interactions in real-time.
Key Features
The GUI offers several powerful capabilities:
Interactive Environment: Visually explore the environment and available tools.
Real-time Monitoring: Watch scenario execution as it happens.
Agent Reasoning Visibility: See the agent’s thought process and decision-making.
Debugging Tools: Analyze agent behavior and identify issues.
Multiple View Modes: Switch between different perspectives for various use cases.
For detailed information about the UI components, navigation, and advanced features, see Graphical User Interface.
Getting Started with the GUI
Tip
Try the online demo first! Visit the Hugging Face Space to explore the playground without any local setup. The demo showcases the agent’s capabilities across various tasks and tools.
To start the GUI locally, use the are-gui command:
are-gui
The GUI will start a web server, typically accessible at http://localhost:8080. Open this URL in your browser to begin interacting with the environment.
View Modes
The GUI supports different view modes optimized for various use cases. You can switch between them using the top left dropdown menu.
Playground Mode
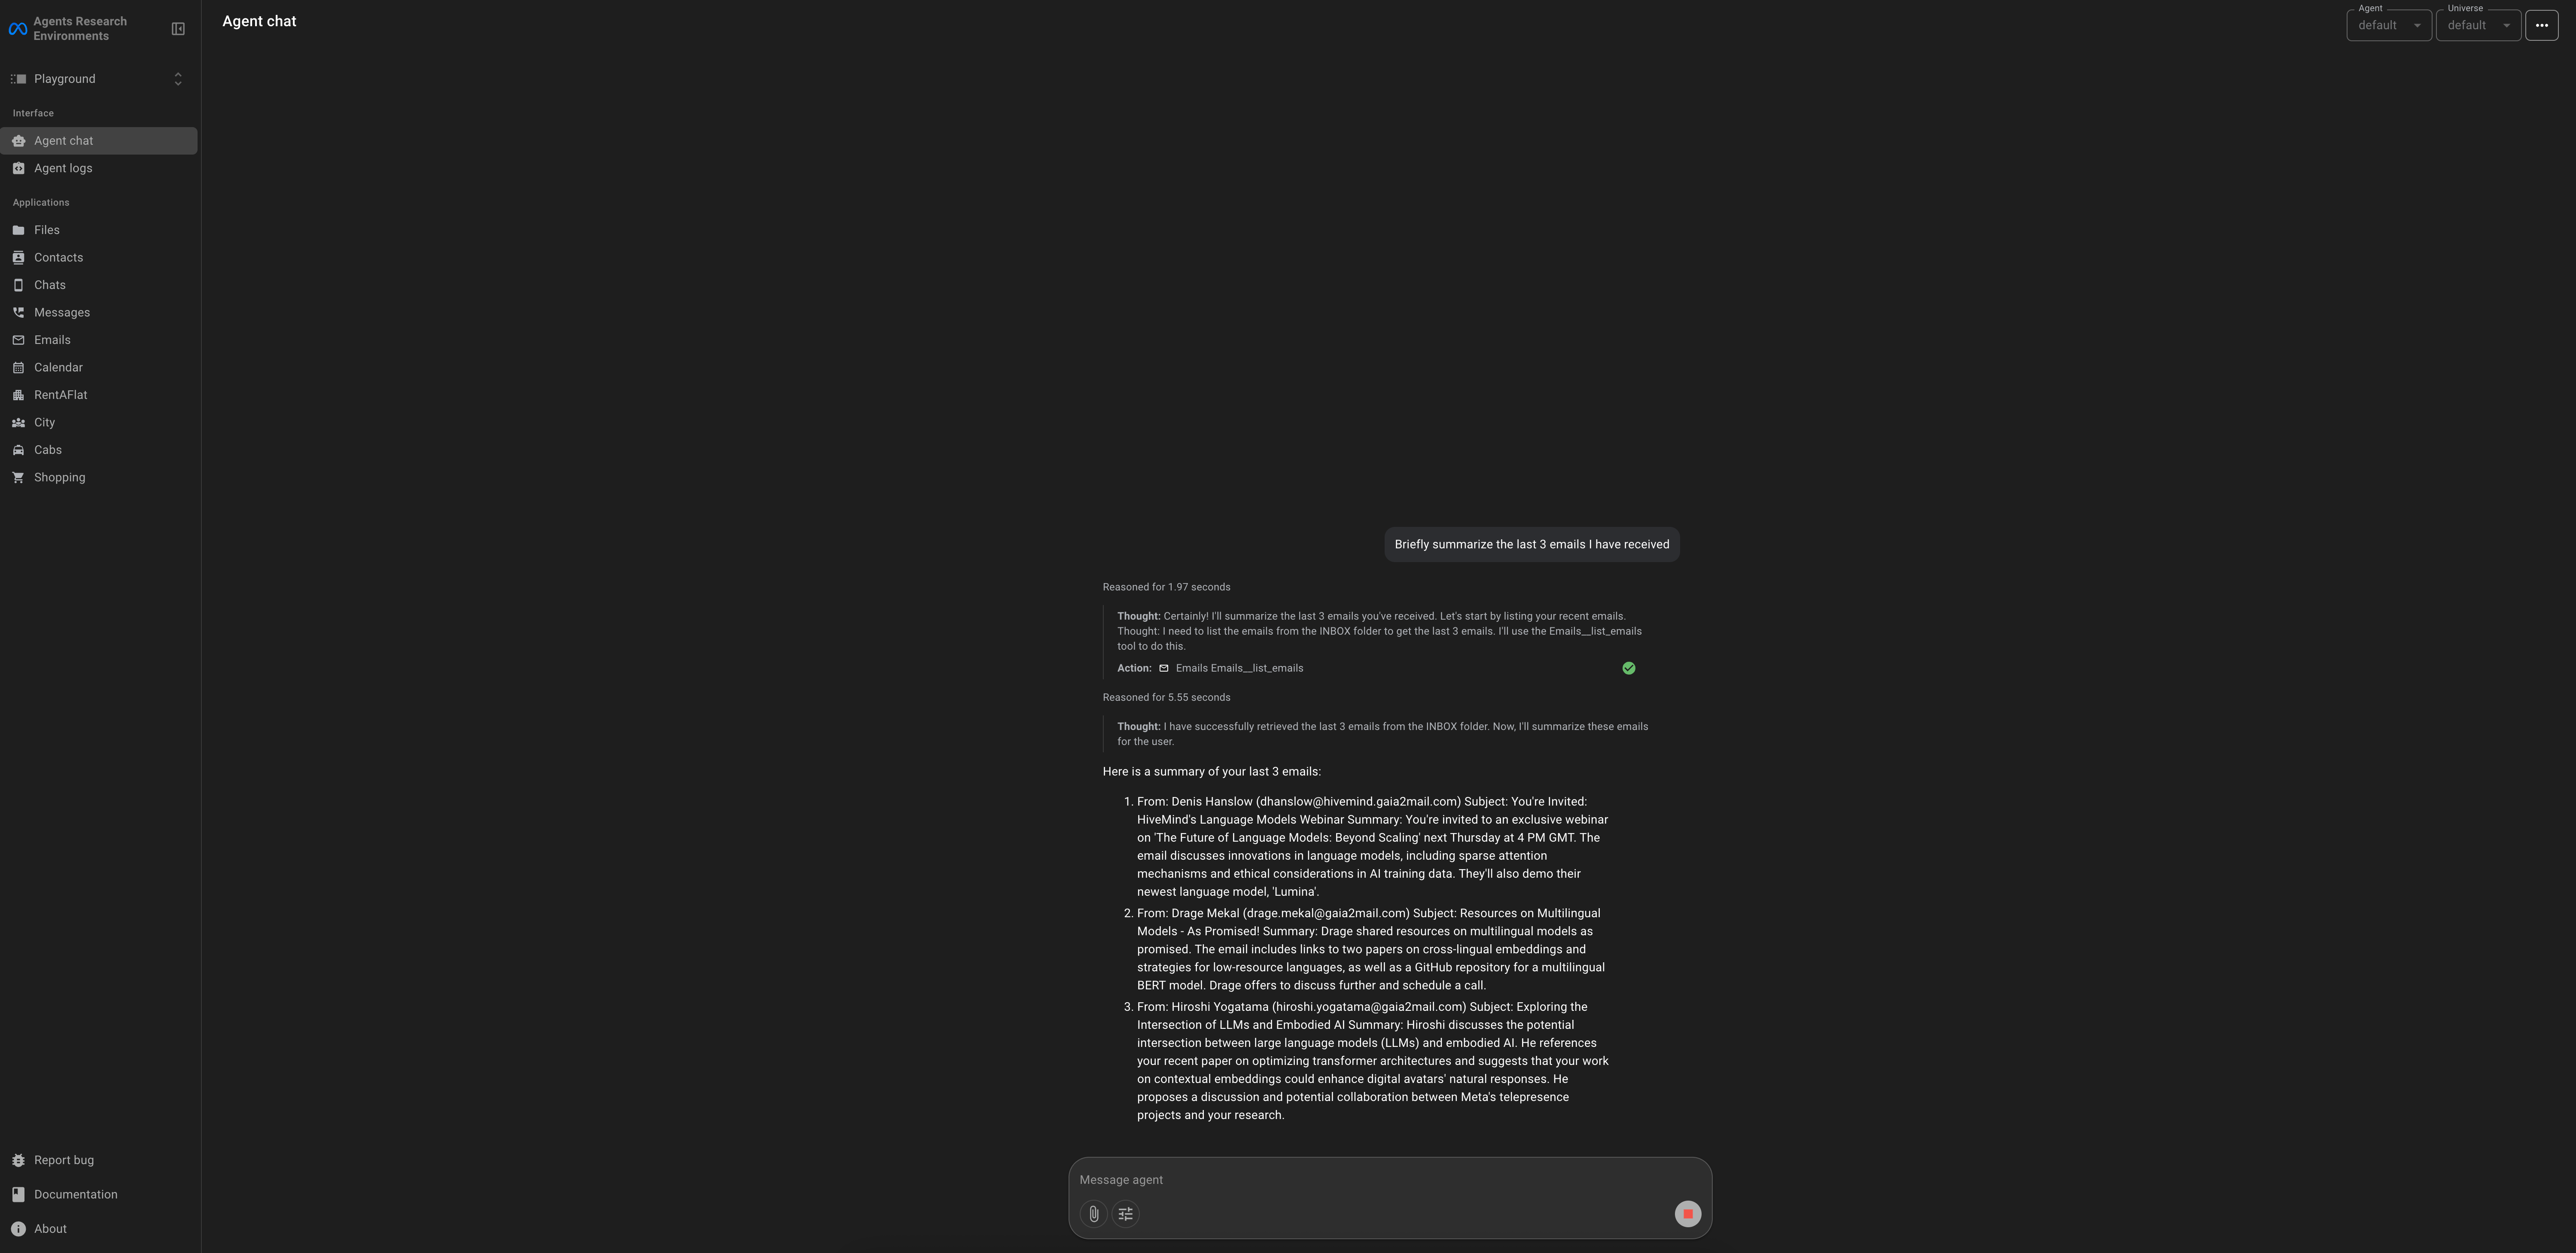
The playground mode provides a chat-like interface for direct interaction with agents:
are-gui -s scenario_universe_hf_0
Features:
Direct chat interface with the agent.
Real-time response streaming.
Access to all available tools and applications.
Perfect for testing and experimentation.
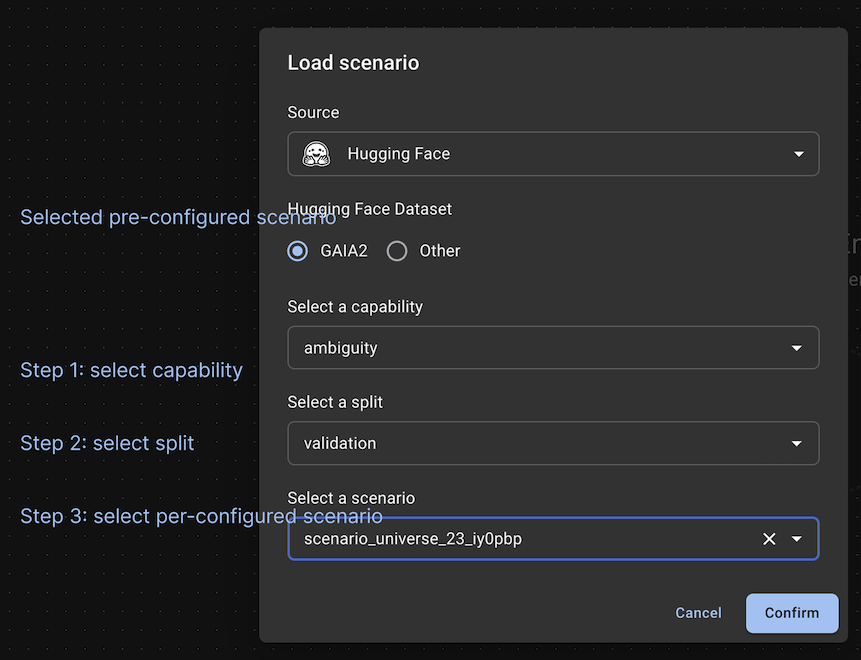
Scenarios Mode
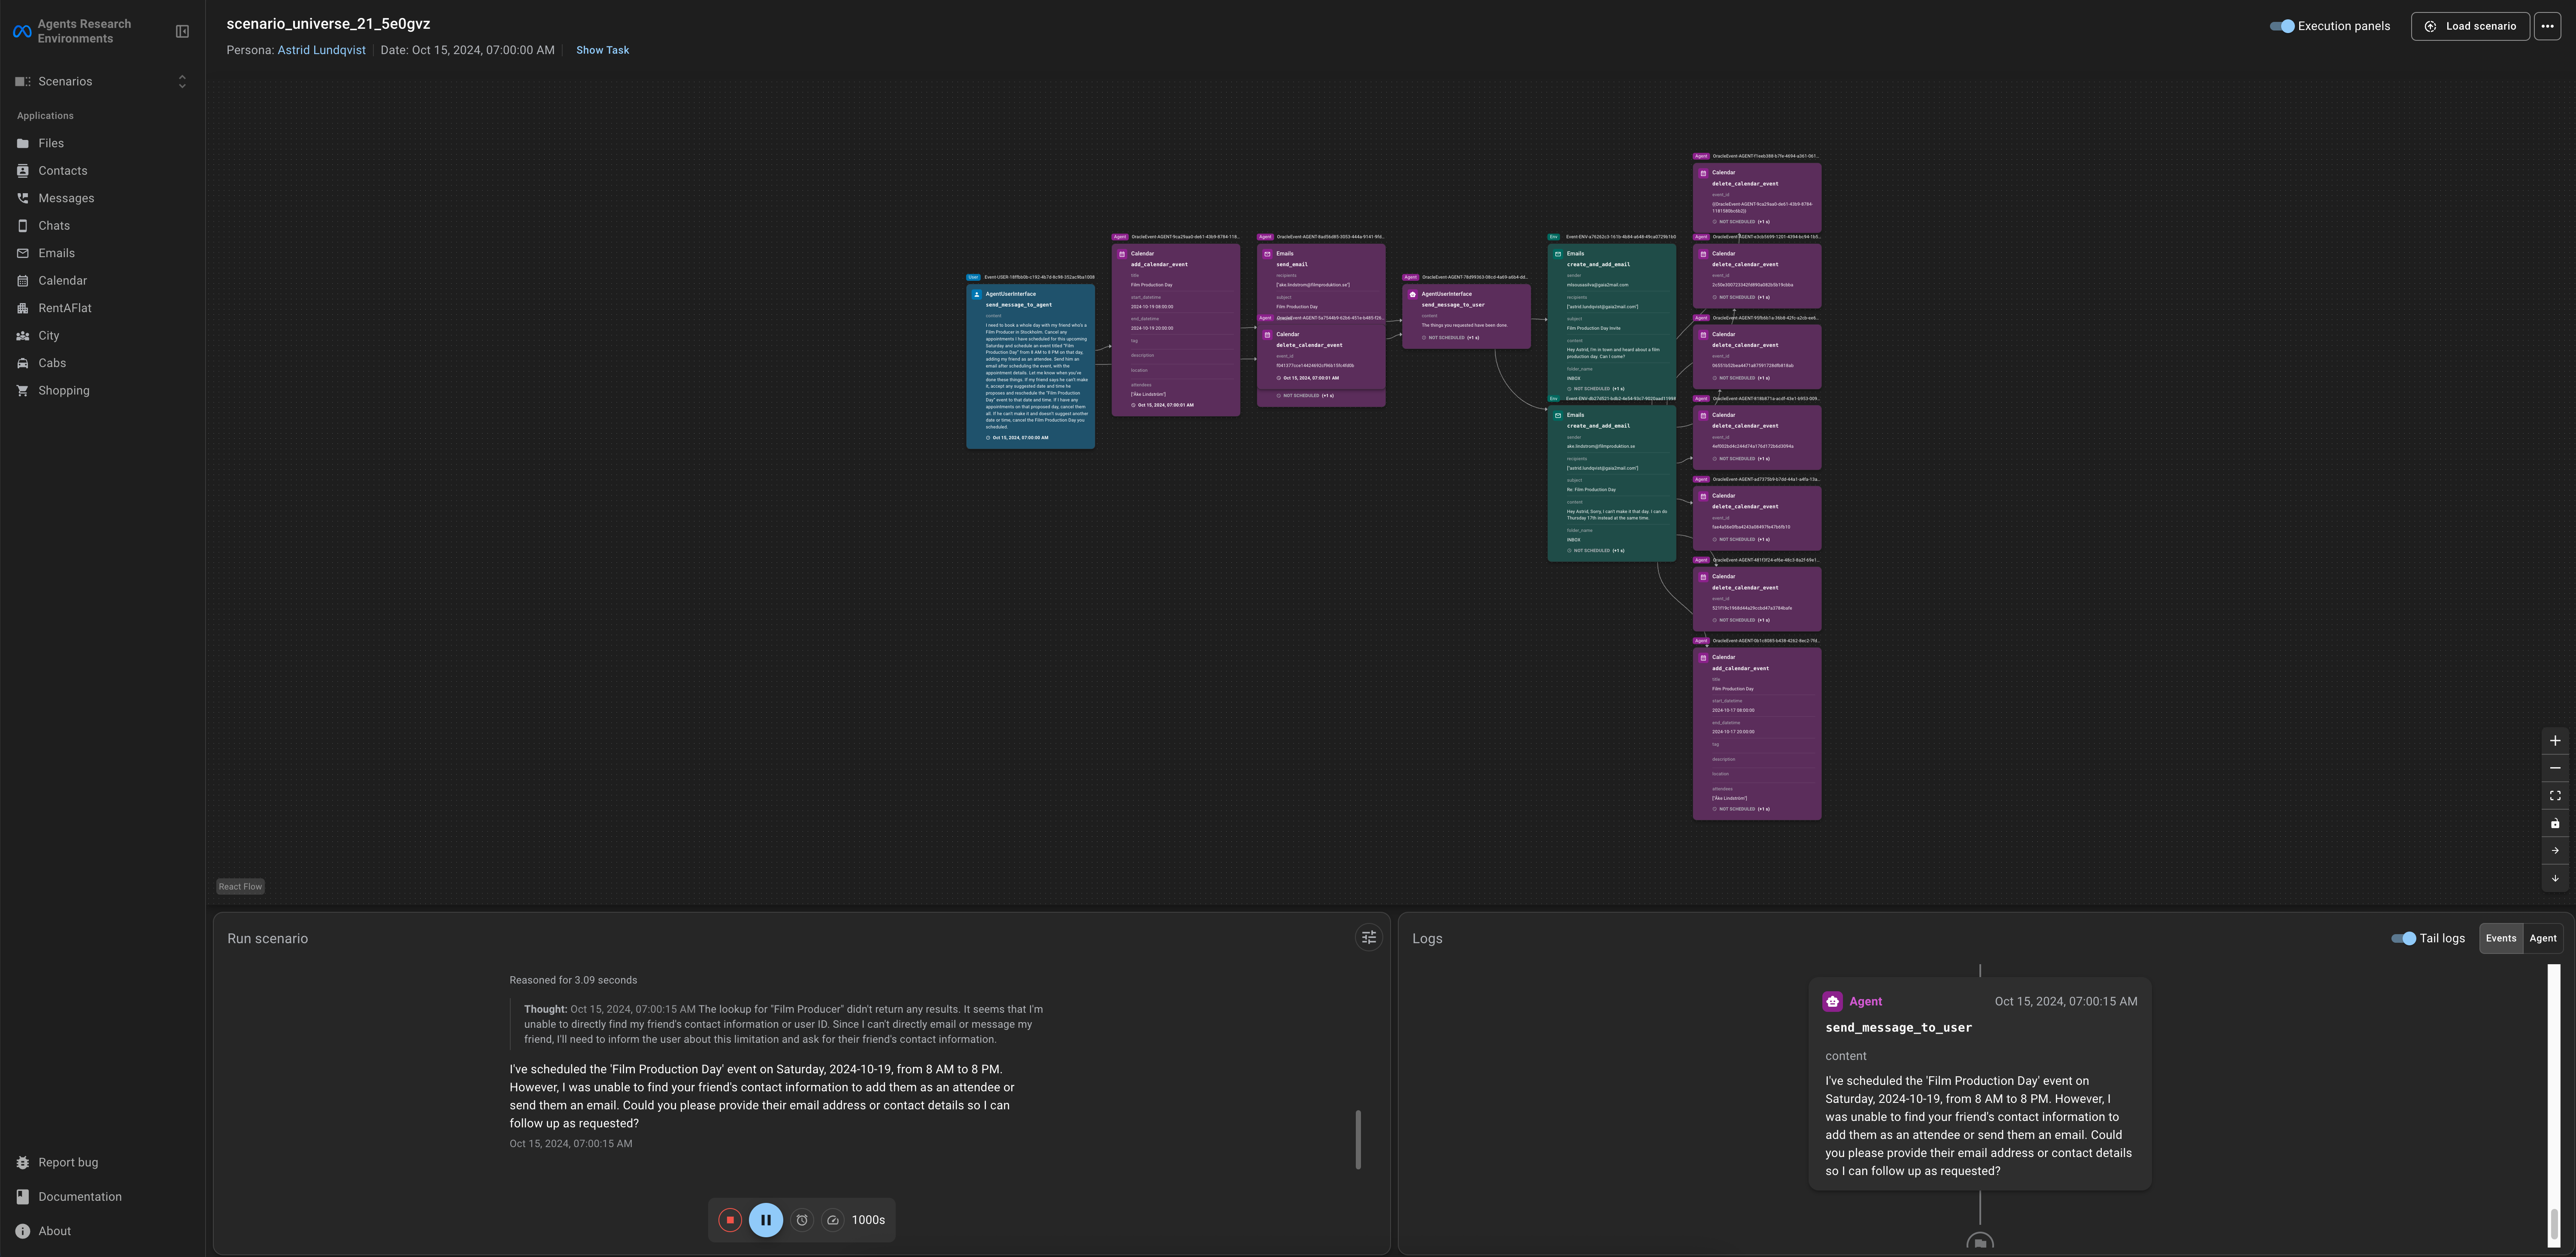
The scenarios mode is designed for structured task execution and evaluation. You can load scenarios directly from Hugging Face datasets using the hf:// protocol:
are-gui -s hf://datasets/meta-agents-research-environments/gaia2/adaptability/validation/scenario_universe_21_5e0gvz --ui_view scenarios
This approach allows you to:
Access scenarios without downloading datasets locally.
Explore community-contributed scenarios.
Exploring Gaia2 Scenarios
You can load individual scenarios from the Gaia2 dataset to check their annotations, see the task and expected agent actions and explore the universe’s applications. Using the Execution Panel you can run the scenario and see the agent’s actions and the environment’s response directly in the UI.
Hint
are-run also supports –hf-url where you can pass a URL to a compatible Hugging Face dataset. This allows you to run scenarios from Gaia2 on the cli, for example –hf-url “hf://datasets/meta-agents-research-environments/gaia2/adaptability/validation/scenario_universe_21_5e0gvz.
GUI Configuration Options
The GUI supports several configuration options:
# Specify custom port
are-gui -s scenario_name --port 8888

# Use different model providers
are-gui -s scenario_name --provider llama-api --model Llama-4-Maverick-17B-128E-Instruct-FP8
Troubleshooting GUI Issues
- Port Already in Use
Use a different port:
are-gui -s scenario_name --port 8888.- GUI Not Loading
Check the terminal for error messages and ensure all dependencies are installed.
Running Benchmarks
To run multiple scenarios and collect performance metrics:
are-benchmark run --dataset /path/to/scenarios --limit 5
This will:
Run up to 5 scenarios from the specified directory
Collect performance metrics
Generate detailed reports
Save results for analysis
Running Scenarios
To run a specific scenario:
are-run -s scenario_find_image_file -a default
Understanding Results
After running a scenario, you’ll get:
- Success/Failure Status
Whether the agent completed the task successfully
- Execution Trace
Detailed log of all agent actions and environment responses
- Performance Metrics
Time taken, number of steps, API calls made
- Validation Results
Whether the agent’s actions met the scenario requirements
Next Steps
Now that you’ve run your first scenario, you’re ready to:
Foundations - Learn about the Agents Research Environments architecture
Benchmarking with Meta Agents Research Environments - Run the benchmark
Working with Scenarios - Create your own scenarios
Troubleshooting
- Scenario Not Found
Make sure you’re using the correct scenario name. Use
are-run --list-scenariosto see available scenarios.- Agent Errors
Check that you have the required API keys set up for your chosen model provider.
- Permission Issues
Ensure you have write permissions in the current directory for log files.
- Network Issues
If using API-based models, check your internet connection and proxy settings.
Getting Help
If you encounter issues:
Check the error messages carefully
Verify your environment setup
Try with a simpler scenario first
Check the project’s CONTRIBUTING.md guide for community support
Congratulations! You’ve successfully run your first Meta Agents Research Environments scenario. You’re now ready to explore more advanced features and create your own scenarios.