Shark
Description
Shark is a lightweight app designed for Augmented Reality (AR) experiences. It is available on both iOS and Android devices.
To try this demo, you'll need to print or display the pattern image used above, which can be found here.
The app offers the ability to utilize individual trackers, such as PatternTracker and WorldTracker, enabling users to seamlessly visualize 3D content in the real world and enhancing the AR experience.
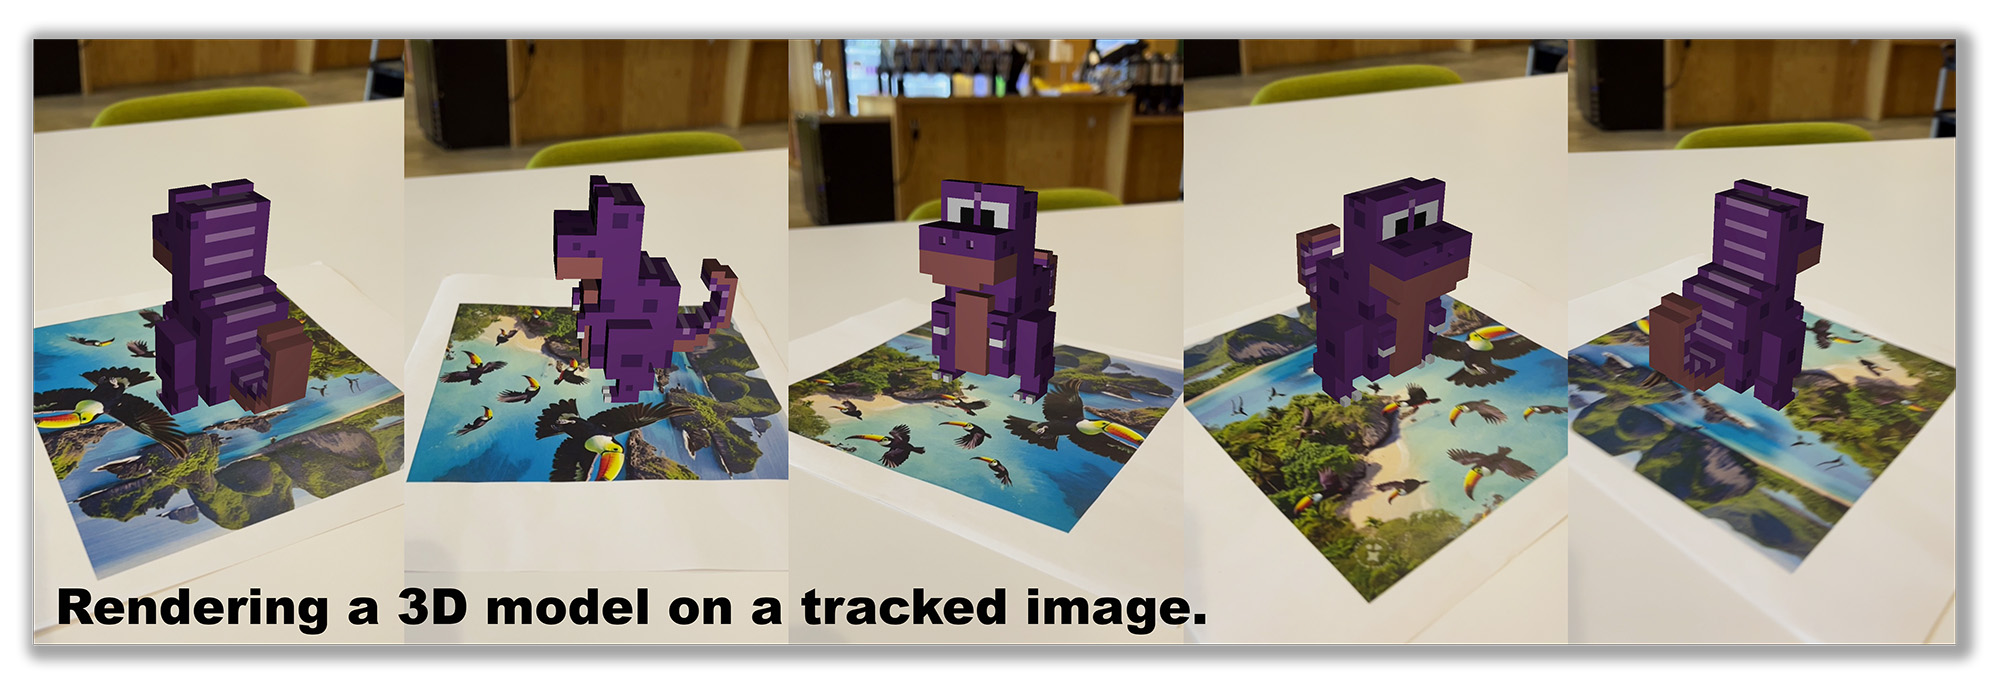
Shark uses a scene description graph to define an application. In the example above, this graph defines the use of a tracker to compute the phone's pose relative to a reference image or pattern. The graph also specifies what should be displayed on the phone screen, visualizing a 3D model of a cute dinosaur standing on the tracked image.
When a suitable JavaScript engine is available, such as V8 engine, it is also possible to create interactive applications where specific conditions can trigger actions (i.e., "if ... then ..."). However, please note that V8 is currently not part of the set of third-party libraries provided by Ocean, which is why interactive applications are not currently supported.
Scene Description using X3D
Ocean provides its own implementations to parse and process various scene description formats, such as VRML and X3D. X3D supports both XML (.x3d) and VRML encodings (.x3dv), as well as Ocean-specific extensions. These extension formats are available in XML (.ox3d) and VRML encodings (.ox3dv) and offer specific features, such as tracker nodes, which will be explained next. For more details on the implementation, please refer to ocean/scenedescription/sdx/x3d.
Let's take a closer look at the example that Shark currently ships with, dinosaur.ox3dv. The file begins by defining a TrackerTransform node:
TrackerTransform
{
  # specifies the tracker to be used: use the Pattern 6DOF tracker here
  tracker "Pattern 6DOF Tracker"

  # use the background (video) image of the viewer as tracker input
  trackerInput "BACKGROUND"
  ...
The tracker type is set to "Pattern 6DOF Tracker", which is the same tracker used by the feature detector demo. It will continuously compute a 6DOF pose for the camera relative to a pattern, which will be defined in the next paragraph. The tracker input "BACKGROUND" indicates that the app should use the same video input used for visualization in the background of the app.
  ...
  # tracking pattern/image
  object "tropical-island-with-toucans.jpeg"

  # horizontal length of the tracking pattern in meters;
  # vertical length is determined by the ratio; height is 0
  objectSize 0.251 0 0
  ...
Next, the file specifies the image file to use for tracking, object path/to/image.png. The path is relative to the scene file and should not include parent directories. To display physically accurate visualizations, it is necessary to specify the dimensions of the pattern image using objectSize lengthX lengthY height. The default unit in Ocean is meters. Note that only the horizontal edge length needs to be specified; setting the vertical length to 0 will determine its value based on the actual image dimensions. The height should be 0 to ensure accurate placement of visualizations on the surface of the pattern image.
  ...
  # standard X3D definition of content and its location relative to the tracked map
  children
  [
    Transform
    {
      scale 0.05 0.05 0.05
      translation 0.1255 0 0.1
      rotation 0 1 0 1.57

      children Inline
      {
        # the X3D standard does not allow inlining non-X3D content, but we allow this
        url "trex.obj"
      }
    }
  ]
}
Finally, a child transformation is attached to the TrackerTransform node, defining a rigid body transformation (scale x y z, translation x y z, rotation x y z radian) with a child node that displays the rendering model of a purple dinosaur (url "trex.obj"). The ability to add non-X3D content is another feature of Ocean's X3D extensions (.ox3d and .ox3dv).
To try this demo with other images and 3D models simply replace the pattern image (object filename), update its size (objectSize x y z) and replace the model file, `url "your_file.obj".
To try this demo with other images and 3D models, simply follow these steps:
- Replace the pattern image by updating the object filename.
- Update the image size by modifying the object size values.
- Replace the model file by changing the url to point to your own file (e.g.,
url "your_file.obj").
This will allow you to customize the demo with your own images and 3D models. Please note that the Android and iOS version have separate asset directories.
Building
Ensure the third-party libraries have been built for Android for all of the required Android ABIs. Let's assume the base location for third-party libraries is ${HOME}/install_ocean_thirdparty, i.e., the Android versions will be located in ${HOME}/install_ocean_thirdparty/android_${ANDROID_ABI}....
# Define this so that Gradle (and CMake) can find the third-party libraries.
export OCEAN_THIRDPARTY_PATH="${HOME}/install_ocean_thirdparty"

# Change into the directory with the Gradle config of this project
cd /path/to/ocean/build/gradle/application/ocean/shark/android

# In ./app/build.gradle.kts, ensure that only those Android ABIs are enabled for which the corresponding third-party libraries have been built. Otherwise, your build will fail, cf. the [general build instructions](https://github.com/facebookresearch/ocean/blob/v1.0.0/building_for_android.md#4-building-the-ocean-android-demotest-apps).

# Build the debug and release APK of this
./gradlew assemble

# Install the desired APK
adb install app/build/outputs/apk/debug/app-debug.apk
adb install app/build/outputs/apk/release/app-release.apk
By default, the log output will be displayed on the screen of the phone as well as in the Android logs, which can be displayed using:
adb logcat -s Ocean
Ensure the third-party libraries have been built for iOS. Then follow the general setup for building iOS apps using XCode. Once the generation of the XCode project is complete, open it and search for application_ocean_shark_ios in the scheme at the top. Then hit CMD-R to build, install, and run the app and follow the instructions.